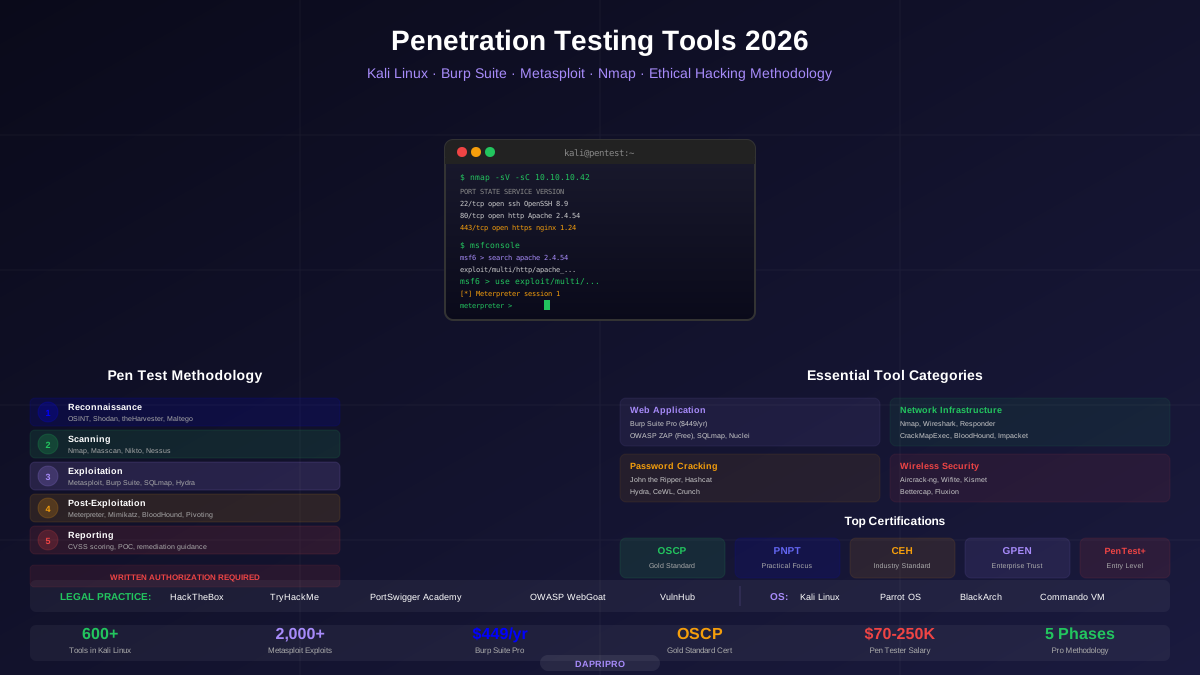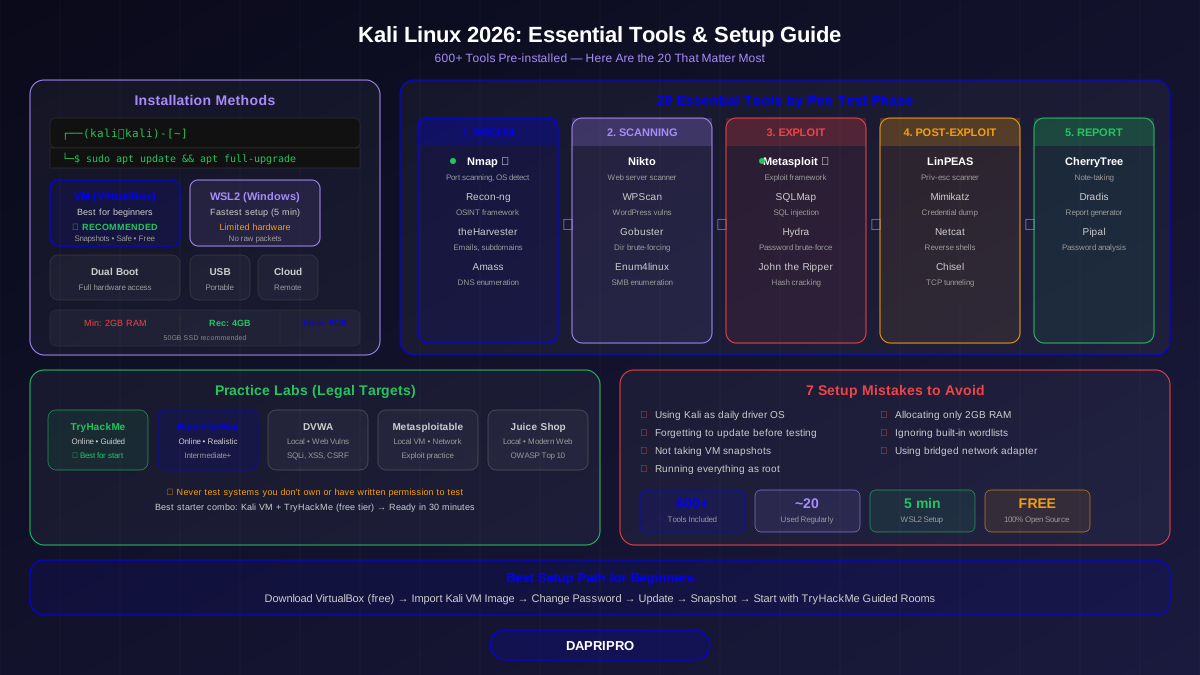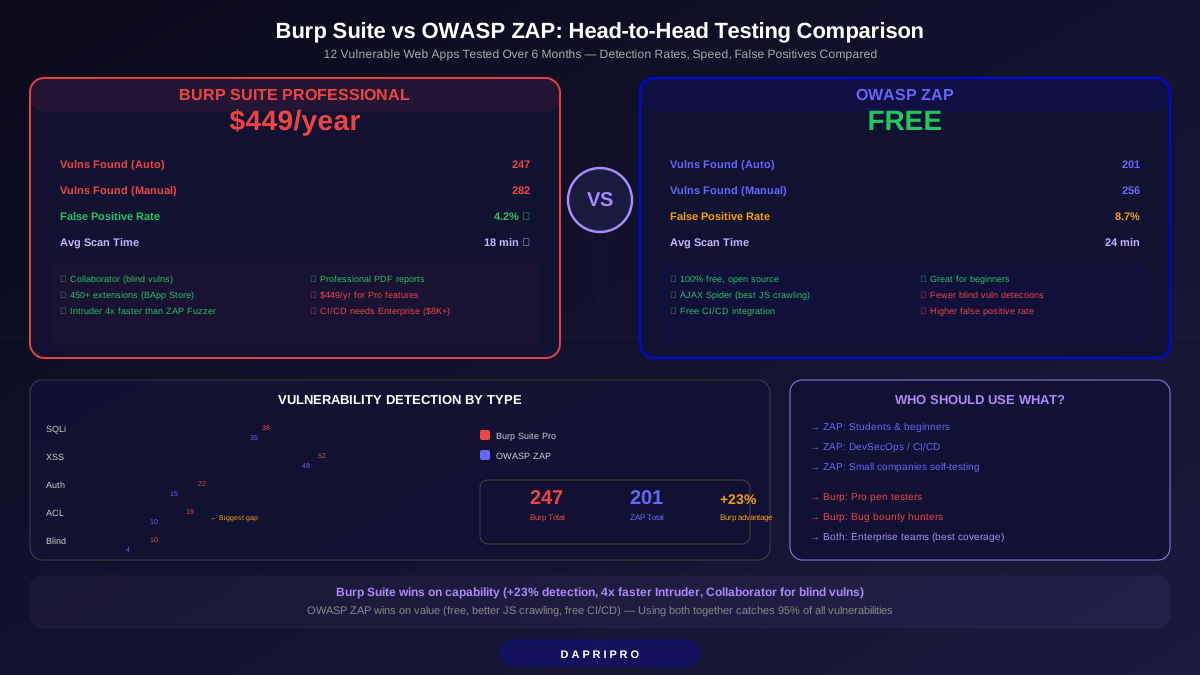

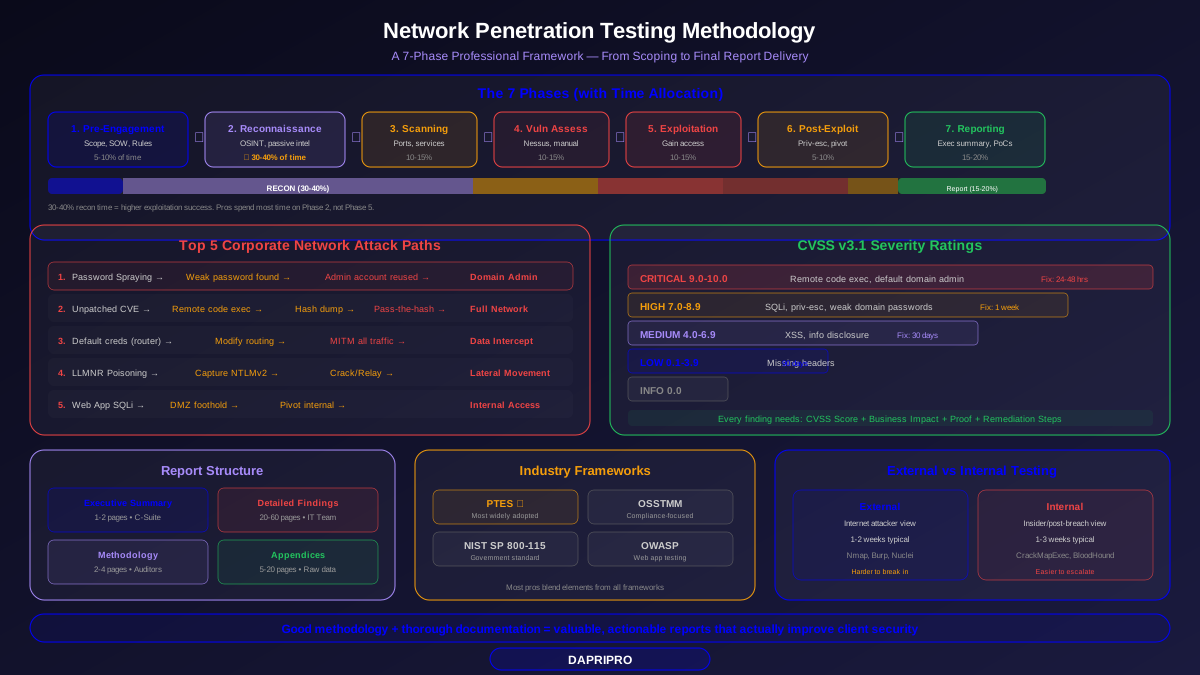
A penetration test without a methodology is just random hacking. Professional pen testers follow a structured framework that ensures nothing gets missed, findings are reproducible, and clients get reports they can actually use to fix things.
This guide covers the complete network penetration testing methodology used by security firms worldwide. Whether you are preparing for your first professional engagement or building a career in offensive security, this framework gives you the step-by-step process from initial client conversation to final report delivery.
Industry Standard Frameworks
Three major frameworks guide professional penetration testing. Most security teams take elements from all three:
| Framework | Full Name | Best For | Key Strength |
|---|---|---|---|
| PTES | Penetration Testing Execution Standard | General pen testing | Most detailed phase-by-phase guidance, widely adopted |
| OSSTMM | Open Source Security Testing Methodology Manual | Compliance-driven tests | Quantitative risk scoring (RAV), audit-ready documentation |
| NIST SP 800-115 | Technical Guide to Information Security Testing | Government/regulatory | Officially recognized by US government agencies |
| OWASP Testing Guide | Open Web Application Security Project | Web applications only | Most comprehensive web-specific testing checklist |
| CREST | Council of Registered Ethical Security Testers | UK/international | Accreditation body with standardized exam requirements |
Our recommendation: Use PTES as your primary structure. It covers the entire engagement lifecycle and is the framework referenced in most pen testing certifications (OSCP, PNPT, CEH).
The 7 Phases of a Network Penetration Test
Phase 1: Pre-Engagement (Scoping)
This happens before any testing. You and the client agree on exactly what will be tested and how. This phase produces the two most important documents of the entire engagement:
| Document | What It Contains | Why It Matters |
|---|---|---|
| Statement of Work (SOW) | Scope, timeline, cost, deliverables, testing windows, emergency contacts | Legal contract — protects both you and the client |
| Rules of Engagement (ROE) | Allowed/forbidden techniques, IP ranges in scope, testing hours, escalation procedures | Keeps you out of legal trouble and prevents accidental damage |
Key scoping questions to ask the client:
- How many IP addresses or hosts are in scope? (External? Internal? Both?)
- Are there any systems that absolutely cannot be tested? (Production databases, medical devices, etc.)
- What testing hours are allowed? (Business hours only? After hours? Weekends?)
- Is social engineering in scope? (Phishing? Physical access attempts?)
- Who do we contact if we accidentally cause an outage?
- What is the expected timeline and report delivery date?
- Has the network been pen tested before? Can we see the previous report?
Phase 2: Reconnaissance (Information Gathering)
This is where you learn everything possible about the target before touching it with scanning tools. Good recon separates amateur testers from professionals. Spend 30-40% of your total engagement time here.
| Recon Type | What You Do | Tools | What You Find |
|---|---|---|---|
| Passive (OSINT) | Gather info without touching the target | Shodan, Google Dorks, Maltego, LinkedIn, WHOIS | Subdomains, employee names, tech stack, email format, leaked credentials |
| Active | Interact directly with target systems | Nmap, Amass, DNS zone transfers, Banner grabbing | Open ports, running services, OS versions, network topology |
Critical OSINT sources most beginners overlook:
- Certificate Transparency logs — crt.sh reveals all SSL certificates issued for a domain, exposing subdomains the client forgot about
- Wayback Machine — web.archive.org shows old versions of the target website, often with configuration files or admin pages that still exist
- GitHub/GitLab — employees accidentally commit API keys, database passwords, and internal documentation to public repos
- Job listings — a job posting for a "Senior FortiGate Admin" tells you they use Fortinet firewalls
- Shodan/Censys — shows internet-facing services, default credentials, and known vulnerabilities without scanning the target yourself
Phase 3: Scanning
Now you actively probe the target. The goal is to map every open port, identify every running service, and build a complete picture of the attack surface.
| Scan Type | Tool | Command Example | Purpose |
|---|---|---|---|
| Port Discovery | Nmap | nmap -sS -p- -T4 target | Find all 65,535 ports (not just common ones) |
| Service Detection | Nmap | nmap -sV -sC -p [ports] target | Identify software and version on each port |
| OS Detection | Nmap | nmap -O target | Identify operating system (Windows vs Linux vs router) |
| Web Directory | Gobuster | gobuster dir -u target -w wordlist | Find hidden pages, admin panels, backup files |
| DNS Enumeration | DNSrecon | dnsrecon -d target.com | Find subdomains, mail servers, DNS misconfigs |
| SMB Enumeration | Enum4linux | enum4linux -a target | Windows shares, users, policies, domain info |
| SNMP Walking | snmpwalk | snmpwalk -v2c -c public target | Network device configs, interfaces, routing tables |
Phase 4: Vulnerability Assessment
Now you analyze your scanning results to identify real vulnerabilities worth exploiting. This is where you separate actual risks from false positives.
| Assessment Method | Tool | Strength | Weakness |
|---|---|---|---|
| Automated scanning | Nessus, OpenVAS, Qualys | Fast, identifies thousands of known CVEs | High false positive rate (20-40%), cannot find logic flaws |
| Manual testing | Burp Suite, curl, custom scripts | Finds complex chained vulnerabilities | Slower, requires expertise, easy to miss simple issues |
| Credential testing | Hydra, CrackMapExec, Medusa | Finds default/weak passwords on network services | Account lockout risk if not careful |
Prioritization framework: Not every vulnerability is worth exploiting during a time-limited engagement. Focus on vulnerabilities that are: (1) remotely exploitable, (2) have public exploit code available, (3) affect critical systems, and (4) are likely to give you elevated access. A critical SQL injection on the main web server matters more than a medium-severity information disclosure on a print server.
Phase 5: Exploitation
This is the phase most people think of as "hacking." You use the vulnerabilities found in Phase 4 to gain unauthorized access. But exploitation in a professional test is very different from what you see in movies:
- Document every step. Before running an exploit, screenshot your terminal. After it succeeds, screenshot the result. You need proof for the report.
- Minimize impact. Never run a destructive exploit. Never delete data. Never modify production configurations. If an exploit crashes a service, stop and notify the client immediately.
- Chain vulnerabilities. Individual medium-severity findings can combine into critical ones. A weak password + privilege escalation + network access = complete domain compromise. This chaining is what makes human pen testers more valuable than automated scanners.
Common exploitation paths on corporate networks:
| Attack Path | Initial Access | Escalation | Impact |
|---|---|---|---|
| Password spraying | Guess common passwords across many accounts | Find admin account with the same password | Domain admin access |
| Unpatched service | Exploit known CVE (e.g., EternalBlue) | Meterpreter → hashdump → pass-the-hash | Full network control |
| Default credentials | Login to network device (router, switch, printer) with admin/admin | Modify routing, capture traffic | Man-in-the-middle on all traffic |
| Responder/LLMNR | Capture NetNTLM hashes from broadcast traffic | Crack hashes → relay to other systems | Lateral movement across the network |
| Web app to internal | SQLi or file upload on public-facing web app | Pivot from DMZ to internal network | Access internal systems from the internet |
Phase 6: Post-Exploitation
After gaining initial access, you demonstrate the real business impact of the vulnerability. This phase answers the client's most important question: "So what? What can an attacker actually do?"
- Privilege escalation: Can you go from a regular user to admin/root? Use LinPEAS (Linux) or WinPEAS (Windows) to find escalation paths.
- Lateral movement: Can you access other systems? Use CrackMapExec, PsExec, or SSH with stolen credentials to move through the network.
- Data access: Can you reach sensitive data? Show that you can access customer databases, financial records, or intellectual property (screenshot the access, never exfiltrate real data).
- Persistence: Could a real attacker maintain access? Describe (but do not actually implement) persistence mechanisms like scheduled tasks, registry keys, or authorized_keys additions.
Phase 7: Reporting
The report is the actual product of a penetration test. A brilliant exploitation means nothing if the report is unclear. Here is what every finding needs:
| Report Element | What to Include | Why It Matters |
|---|---|---|
| Finding Title | Clear, descriptive name (not CVE numbers) | "Default Admin Credentials on Core Switch" is better than "CVE-XXXX" |
| Severity | CVSS v3.1 score + Critical/High/Medium/Low/Info | Helps the client prioritize fixes |
| Description | What the vulnerability is in plain English | Non-technical stakeholders need to understand the risk |
| Business Impact | What an attacker could do with this vulnerability | "Could lead to complete network compromise" motivates action |
| Proof of Concept | Screenshots and commands showing the exploit worked | Proves the finding is real, not theoretical |
| Remediation | Specific steps to fix the issue | "Change the password" is not enough — specify complexity, rotation, MFA |
| References | CVE IDs, vendor advisories, CWE numbers | Helps the client research the issue further |
Severity Ratings: How to Score Findings
Use CVSS v3.1 (Common Vulnerability Scoring System) to assign consistent severity ratings. Here is a quick reference:
| CVSS Score | Severity | Example | Expected Fix Timeline |
|---|---|---|---|
| 9.0 - 10.0 | Critical | Remote code execution on public-facing server, default admin on domain controller | Immediate (24-48 hours) |
| 7.0 - 8.9 | High | SQL injection on authenticated page, privilege escalation, weak domain passwords | Within 1 week |
| 4.0 - 6.9 | Medium | Cross-site scripting, information disclosure, outdated software | Within 30 days |
| 0.1 - 3.9 | Low | Missing HTTP headers, verbose error messages, cookie flags | Within 90 days |
| 0.0 | Informational | Server banner disclosure, open ports that are expected | At client discretion |
Internal vs External Testing: Key Differences
| Aspect | External Test | Internal Test |
|---|---|---|
| Perspective | Internet attacker with no insider knowledge | Malicious insider or attacker who breached the perimeter |
| Scope | Public-facing IPs, web apps, mail servers, VPN | Internal network, Active Directory, file shares, printers |
| Common findings | Outdated web servers, weak SSL, exposed admin panels | Weak AD passwords, LLMNR poisoning, SMB signing disabled |
| Typical duration | 1-2 weeks | 1-3 weeks |
| Usual result | Harder to break in (perimeter is usually strong) | Easier to escalate (internal networks are usually softer) |
| Key tools | Nmap, Burp Suite, Nuclei, ffuf | CrackMapExec, Responder, BloodHound, Mimikatz |
Documentation Tips That Save Hours
- Use CherryTree or Obsidian. Create a tree structure: Target → Service → Finding. Paste every command and output as you go.
- Screenshot everything. Use Flameshot on Kali for easy annotated screenshots. Capture BEFORE and AFTER states for each exploit.
- Timestamp your notes. When the client asks "when did you run that scan?", you need to know the exact time.
- Save all raw tool outputs. Redirect everything to files: nmap -sV target -oA scan_results. You will reference these when writing the report.
- Write finding summaries immediately after exploitation. Do not wait until the end of the engagement — you will forget important details.
A structured methodology transforms penetration testing from guesswork into a repeatable, professional service. Follow these 7 phases, document everything, and deliver reports that actually help clients fix their security — that is what separates a professional pen tester from someone who just runs tools.