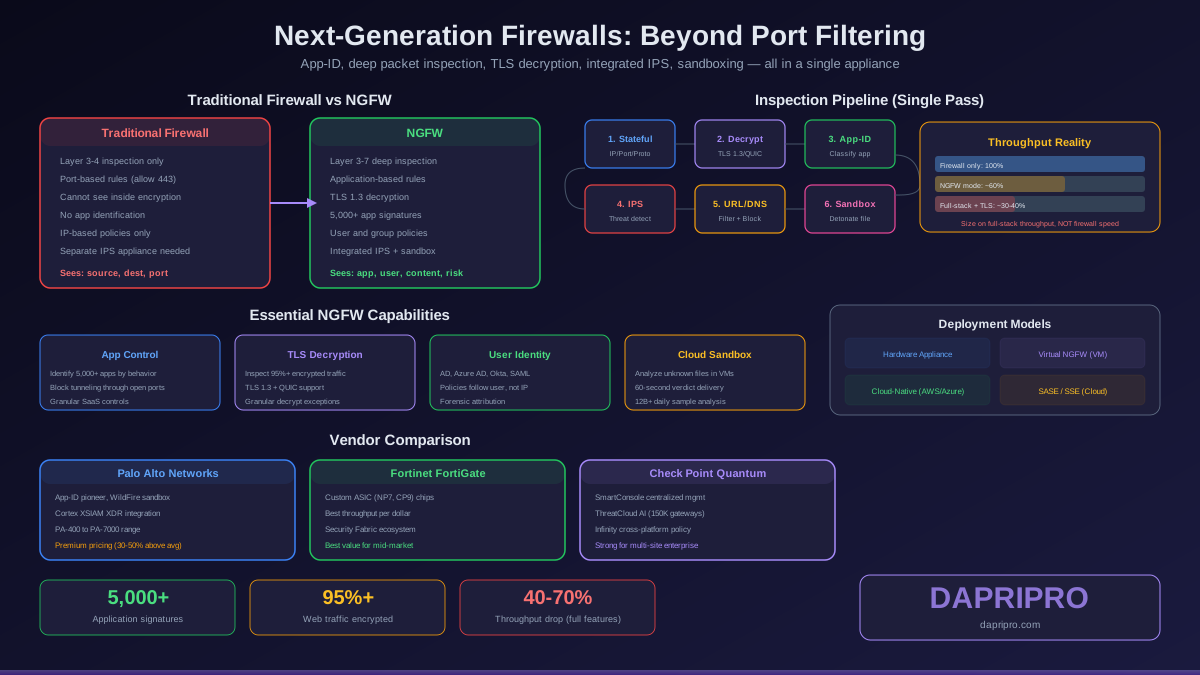

Commercial firewalls from Fortinet, Palo Alto, and SonicWall cost thousands for the hardware and thousands more annually in subscription renewals for features you may already have access to for free. pfSense, built on FreeBSD and maintained by Netgate, provides the same core functionality — stateful packet filtering, NAT, VPN, intrusion detection, traffic shaping — on commodity hardware with no licensing fees.
This is not a toy or a homelab project. pfSense runs in production environments protecting law firms, medical offices, retail chains, and manufacturing facilities. Here is how to set it up properly for a business network.
Hardware Selection
Minimum Specifications by Business Size
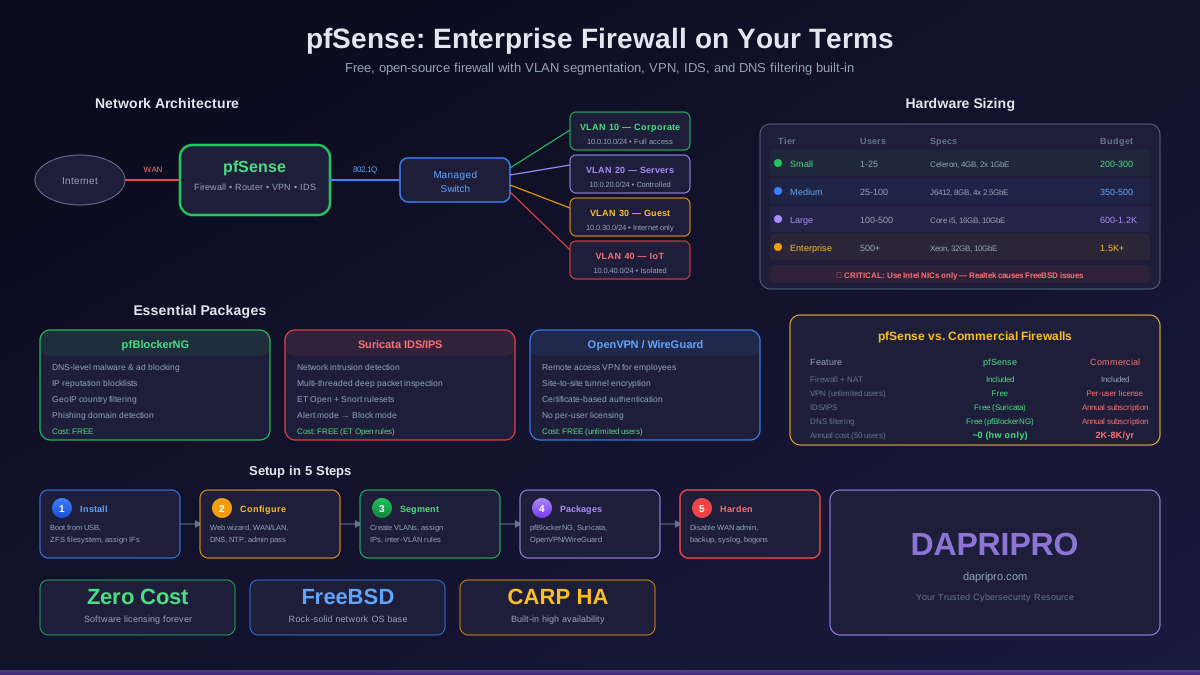
- 1-25 users, sub-500 Mbps internet: Intel Celeron/Atom processor, 4GB RAM, 32GB SSD/eMMC, 2x 1GbE Intel NICs. Budget: approximately 200-300. Example: Protectli VP2410 or Netgate 2100
- 25-100 users, up to 1 Gbps internet: Intel Celeron J6412 or better, 8GB RAM, 128GB SSD, 4x 2.5GbE Intel NICs. Budget: approximately 350-500. Example: Protectli VP2420 or Netgate 4100
- 100-500 users, gigabit+ internet: Intel Core i5/i7, 16-32GB RAM, 256GB SSD, 4-6x 2.5GbE or 10GbE Intel NICs. Budget: approximately 600-1,200. Example: custom build or Netgate 6100
- 500+ users or multi-gigabit: Intel Xeon, 32-64GB RAM, enterprise SSD, 10GbE Intel NICs. Budget: approximately 1,500+. At this scale, also evaluate pfSense Plus or commercial alternatives for support SLAs
Critical hardware rule: use Intel NICs (i210, i225-V, i226-V, X710 for 10GbE). Realtek NICs have inconsistent FreeBSD driver support and can cause intermittent issues under load. This is the single most important hardware decision for a pfSense build.
Dedicated Appliance vs. Repurposed Hardware
For a business deployment, use a dedicated appliance or purpose-built mini PC — not a repurposed desktop or old server. Reasons:
- Lower power consumption (10-25W vs. 100-300W for a desktop/server)
- Fanless designs available for noise-sensitive office environments
- Compact form factor fits in a network rack or shelf
- Multiple Ethernet ports built-in (no USB-to-Ethernet adapters, which are unreliable for production use)
Initial Installation and Configuration
Installation
- Download the pfSense CE installer ISO from the pfSense website. Verify the SHA-256 hash
- Write the ISO to a USB drive using Rufus (Windows) or dd (Linux/macOS)
- Connect a monitor and keyboard to the appliance. Boot from the USB drive
- Follow the installer: accept defaults for filesystem (ZFS recommended for SSD reliability), select the target drive, and wait for installation to complete
- Remove the USB drive and reboot. pfSense will boot to the console menu
Interface Assignment
At the console, pfSense will prompt you to assign interfaces:
- WAN: The port connected to your ISP modem/handoff. This gets your public IP via DHCP (or static, depending on your ISP)
- LAN: The port connected to your internal network switch. Default IP: 192.168.1.1/24
- Additional ports can be assigned later for DMZ, guest network, or additional VLANs
Initial Web GUI Configuration
Connect a laptop to the LAN port and navigate to https://192.168.1.1. Default credentials: admin / pfsense. The setup wizard will walk through:
- General settings: Set hostname (e.g., "fw01"), domain (e.g., "corp.yourcompany.com"), and DNS servers (use 1.1.1.1 and 9.9.9.9 for privacy-focused resolvers, or your ISP's DNS for compatibility)
- Time server: Set NTP to pool.ntp.org and your timezone. Accurate time is critical for log correlation and certificate validation
- WAN configuration: Configure per your ISP — DHCP for most cable/fiber, PPPoE for DSL, or static IP for business circuits
- LAN configuration: Change the LAN subnet from default if needed (e.g., 10.0.10.0/24 instead of 192.168.1.0/24 to avoid conflicts with home networks during VPN connections)
- Admin password: Set a strong password immediately. This password protects full control of your network perimeter
VLAN Segmentation
Network segmentation is the highest-impact security improvement you can make with pfSense. Create separate VLANs for each security zone:
Creating VLANs
- Navigate to Interfaces > Assignments > VLANs
- Click Add for each VLAN. Configure the parent interface (usually the LAN port), VLAN tag (10, 20, 30, etc.), and description
- After creating VLANs, go to Interfaces > Assignments and assign each VLAN as a new interface
- Enable each interface, assign an IP address (e.g., VLAN 10 Corporate = 10.0.10.1/24, VLAN 20 Servers = 10.0.20.1/24), and enable DHCP if needed
Recommended Business VLANs
- VLAN 10 — Corporate LAN: Employee workstations. Full internet access, access to servers, no access to IoT or guest networks
- VLAN 20 — Servers/DMZ: Internal servers (file server, print server, internal apps). Accessible from corporate LAN, restricted internet access (outbound patches only)
- VLAN 30 — Guest Wi-Fi: Internet-only access. No access to any internal network. Rate-limited bandwidth. Client isolation enabled on the AP
- VLAN 40 — IoT/Cameras: Security cameras, smart devices, printers. Isolated from all other VLANs. Controlled internet access for firmware updates and cloud services only
- VLAN 50 — VoIP: Phone system on its own VLAN with QoS priority. Required for call quality and to isolate phone traffic from general network congestion
Inter-VLAN Firewall Rules
The power of VLAN segmentation comes from the firewall rules controlling traffic between VLANs. Navigate to Firewall > Rules and configure rules on each VLAN interface:
- Corporate → Servers: Permit specific ports (SMB for file shares, HTTP/HTTPS for web apps, RDP for remote management)
- Corporate → Guest: Block all — employees have no reason to access guest devices
- Guest → Everything: Block all RFC 1918 addresses (private networks). Permit only DNS (53) and HTTP/HTTPS (80/443) to the internet. This gives guests internet access while preventing access to any internal resource
- IoT → Everything: Block all except specific cloud service IPs/domains required by the devices (e.g., camera cloud storage, smart thermostat API endpoints)
Essential pfSense Packages
pfBlockerNG-devel
DNS-level blocking for ads, malware domains, and known malicious IPs. Functions like Pi-hole but integrated directly into pfSense. Configure DNSBL feeds from sources like Steven Black's hosts list, Abuse.ch, and SANS blocklists. This single package blocks the majority of ad-tracking, phishing domains, and malware C2 callbacks at the DNS level before they reach any device.
Snort or Suricata
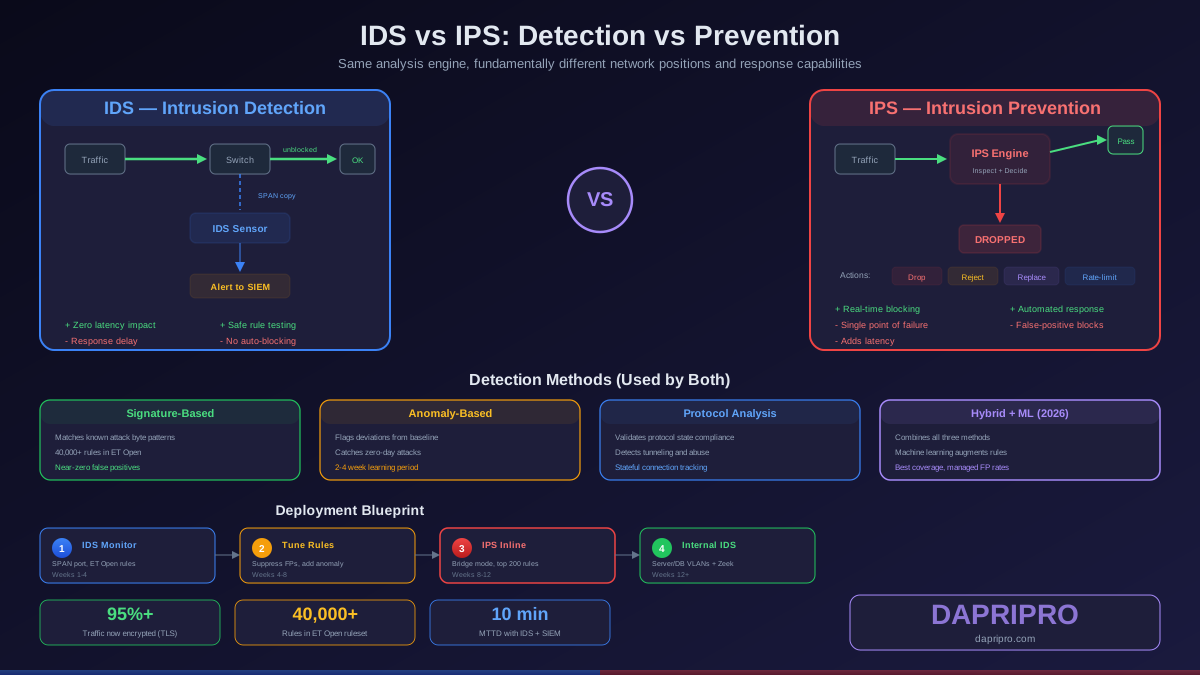
Network intrusion detection and prevention. Monitors all traffic for known attack signatures and anomalous behavior. Choose one — Suricata is recommended for new deployments because it supports multi-threaded packet processing and handles higher throughput. Configure with the ET Open ruleset (free) or Snort Subscriber Rules (paid, more comprehensive). Run in IDS mode initially (alert only) for 2-4 weeks to tune false positives before switching to IPS mode (block).
OpenVPN / WireGuard
pfSense supports both OpenVPN and WireGuard for VPN:
- Remote access VPN: Allow employees to securely access the corporate network from home or while traveling. Configure with certificate-based authentication (not just passwords) for proper security
- Site-to-site VPN: Connect branch offices to headquarters over encrypted tunnels. WireGuard offers better performance and simpler configuration than OpenVPN for site-to-site links
Production Hardening Checklist
- Disable WebGUI on WAN: System > Advanced > Admin Access. Uncheck "Anti-lockout Rule" on WAN (keep it on LAN). Ensure no firewall rule permits HTTP/HTTPS to the firewall from WAN
- HTTPS-only admin access: System > Advanced > Admin Access. Set protocol to HTTPS only. Generate or import a proper TLS certificate via ACME package to avoid browser warnings
- Restrict admin access to management VLAN: Create a dedicated management VLAN (or restrict to specific admin workstation IPs). Create a firewall rule blocking WebGUI access from all other networks
- Disable SSH unless needed: If SSH is required for remote management, restrict to key-based authentication only and limit to management VLAN IPs
- Configure automated backups: Install the AutoConfigBackup package. pfSense stores its entire config in /cf/conf/config.xml — back this up daily to encrypted off-site storage. Test restoration quarterly
- Remote syslog: Forward logs to a separate syslog server so that if the firewall is compromised, the attacker cannot erase the logs. Configure under Status > System Logs > Settings
- Bogon and RFC 1918 blocking on WAN: Block inbound traffic from private IP ranges and bogon networks on your WAN interface (enabled by default, verify it is still active)
Ongoing Monitoring and Maintenance
- Dashboard widgets: Configure the pfSense dashboard with system information, interface traffic graphs, firewall log summaries, and gateway status widgets. Check daily for unusual patterns
- Firmware updates: pfSense releases security patches and feature updates regularly. Subscribe to pfSense security advisories and apply patches within a maintenance window. Test on a non-production instance first if you have one
- Rule review: Review firewall rules quarterly. Remove rules for decommissioned services, tighten overly broad rules, and verify that temporary rules have been removed
- CARP high availability (optional): For businesses requiring maximum uptime, deploy two pfSense instances in a CARP (Common Address Redundancy Protocol) cluster. The secondary unit automatically takes over if the primary fails, providing seamless failover within seconds
The Bottom Line
pfSense delivers enterprise firewall functionality without enterprise pricing. The initial setup takes a few hours — hardware assembly, installation, VLAN configuration, and hardening. The ongoing maintenance requirement is modest: firmware updates, rule reviews, and backup verification. For businesses spending thousands annually on commercial firewall subscriptions for features they may not use, pfSense is worth serious evaluation. Start with a test deployment alongside your existing firewall, migrate one VLAN at a time, and validate each step before cutting over fully.