
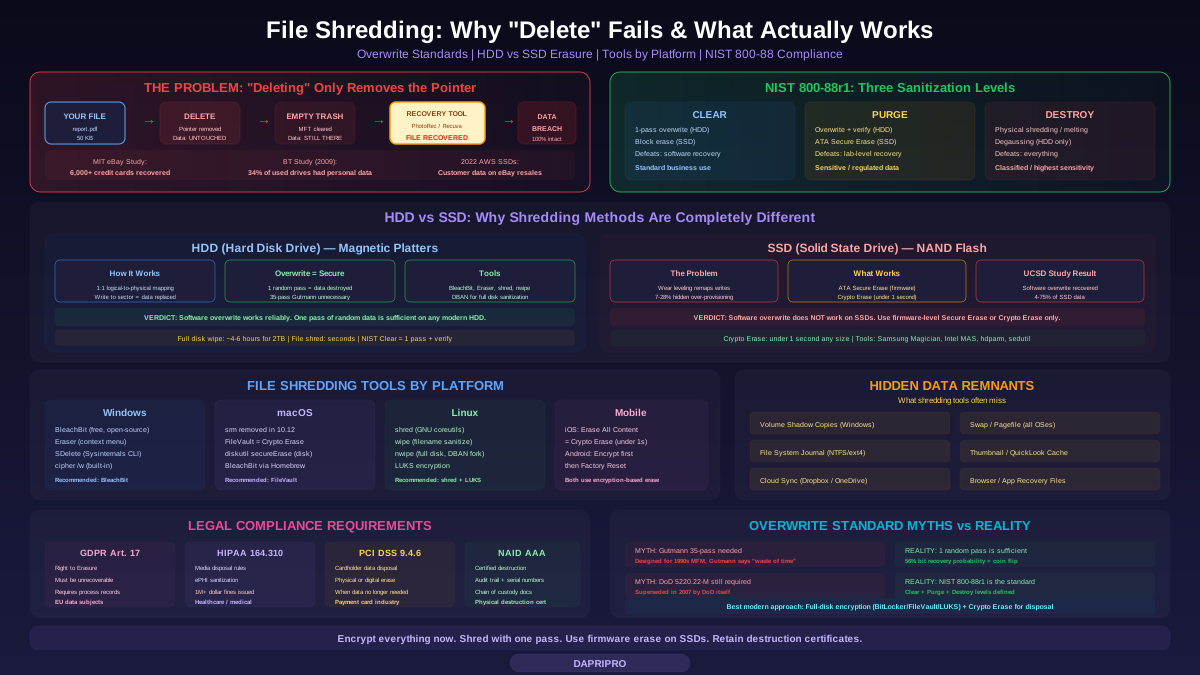
You right-click a file, press Delete, and empty the Recycle Bin. Gone forever, right? Not even close. That file is still sitting on your drive, fully intact, waiting for anyone with a free recovery tool and 30 seconds of patience to bring it back. The file system simply removed the pointer that said where the file lived. Think of it like ripping a page out of a book's table of contents — the chapter is still there. Every chapter is still there.
This is not a hypothetical risk. In 2003, MIT graduate students Simson Garfinkel and Abhi Shelat purchased 158 used hard drives on eBay and recovered over 6,000 credit card numbers, medical records, personal emails, and corporate financial data. A 2009 BT study found that 34 percent of secondhand hard drives contained recoverable personal data. In 2022, a German security researcher bought used enterprise SSDs from AWS data centers on eBay and recovered customer data from improperly wiped drives. The pattern is always the same: people believe their data is gone, and it is not.
This guide explains exactly how file deletion works at the storage level, why your data survives it, and which methods actually destroy data permanently — for both traditional hard drives and modern SSDs, across every major operating system.
Why Delete Does Not Delete: How File Systems Actually Work
To understand why file shredding exists, you need to understand what happens at the storage level when you delete a file. The answer is surprisingly little.
What Actually Happens When You Press Delete
Every storage device uses a file system — NTFS on Windows, APFS on modern Macs, ext4 on Linux — that maintains a metadata table mapping file names to their physical locations on disk. When you delete a file, the operating system performs exactly one operation: it marks that file's entry in the metadata table as available. The actual data written to the disk sectors remains completely untouched.
On NTFS, the Master File Table (MFT) entry for the deleted file gets its "in-use" flag cleared. On ext4, the inode gets deallocated and added to the free inode list. On APFS, the file's extents get released back to the space manager. In every case, the physical data on the storage media is identical before and after deletion. Not a single bit of the actual file content changes.
This design exists for performance. Actually overwriting every deleted file's data would be dramatically slower — imagine waiting 30 seconds every time you deleted a 2 GB video file. Operating systems took the rational engineering shortcut: mark the space as available and let future writes eventually overwrite it organically.
How Easy Is Data Recovery?
Recovery is trivially easy. PhotoRec, a free open-source tool, performs file carving — scanning raw disk sectors for known file signatures regardless of the file system metadata. It does not care that NTFS says the sectors are "free." It reads the actual bytes, recognizes JPEG headers, PDF structures, DOCX ZIP containers, and reconstructs complete files.
On a lightly used drive, deleted files can persist for months or even years. On a heavily used drive where sectors get reused frequently, files might survive hours or days. But in both cases, a meaningful window of vulnerability exists — and it only takes one recovered file containing a password, financial statement, or private photo to cause serious damage.
Professional data recovery services push even further. Clean room techniques can recover data from physically damaged platters. Electron microscopy (though extremely expensive and rarely used) can theoretically detect residual magnetic patterns from previous writes on older drives. Law enforcement agencies routinely recover data that users believed was permanently destroyed.
The Evolution of Overwrite Standards: From Gutmann to NIST 800-88
The file shredding industry has a confusing legacy of overwrite standards, many of which are now obsolete. Understanding which standards matter in 2026 saves you from wasting hours on pointless multi-pass overwrites.
The Gutmann Method: 35 Passes of Obsolescence
In 1996, Peter Gutmann published a paper describing a 35-pass overwrite method. The paper became legendary, and "Gutmann 35-pass" became synonymous with secure deletion. But Gutmann himself has repeatedly stated that the method was designed for specific 1990s drive encoding schemes — MFM and RLL — that no modern drive uses. In the epilogue added to his original paper, Gutmann wrote that performing a 35-pass overwrite on a modern drive is "a waste of time" and that "a few passes of random scrubbing is the best you can do."
DoD 5220.22-M: The Three-Pass Military Standard
The U.S. Department of Defense standard 5220.22-M specified a three-pass overwrite: pass with zeros, pass with ones, pass with random data, then verify. This standard was reasonable for its era but was officially superseded in 2007. The DoD itself no longer uses software-based erasure for classified storage — those drives get physically destroyed.
NIST 800-88 Revision 1: The Current Standard
The National Institute of Standards and Technology published Special Publication 800-88 revision 1 in December 2014, and it remains the authoritative reference in 2026. NIST defines three sanitization levels:
- Clear — Logical techniques that overwrite data in all user-addressable storage locations. Protects against simple non-invasive data recovery (keyboard, software tools). A single overwrite pass with fixed data values is sufficient for Clear-level sanitization on HDDs.
- Purge — Physical or logical techniques that render data recovery infeasible using state-of-the-art laboratory techniques. For HDDs, this means overwrite with at least one pass plus verification. For SSDs, this means ATA Secure Erase, block erase, or Crypto Erase commands issued at the firmware level.
- Destroy — Physical destruction rendering the media incapable of storing data. Includes disintegration, pulverization, melting, and incineration. Required for the highest-sensitivity data (Top Secret and above in government contexts, high-risk PII in commercial contexts).
The critical insight from NIST 800-88: for modern drives, a single overwrite pass is sufficient for Clear-level sanitization. The physics of modern high-density recording make it infeasible to recover overwritten data even with advanced techniques. Research by Craig Wright, Dave Kleiman, and Shyaam Sundhar (2008) confirmed this, finding that the probability of correctly recovering a single overwritten bit on a modern drive is approximately 56 percent — essentially a coin flip — making reconstruction of meaningful data statistically impossible.
The HDD vs SSD Challenge: Why Shredding SSDs Is Different
Here is where most file shredding guides fail. They treat all storage the same. HDDs and SSDs are fundamentally different technologies with completely different secure erasure requirements.
Hard Disk Drives: Straightforward Overwriting
HDDs store data magnetically on spinning platters. When you write to a specific sector on an HDD, the data at that sector is physically replaced by the new data. This one-to-one mapping between logical addresses and physical locations makes overwriting reliable — write random data to sectors 4821 through 4830, and the old data at those sectors is genuinely destroyed.
For HDDs, software-based overwrite tools work exactly as intended. Write one pass of random data across either the target file's sectors or the entire drive, verify the write completed, and the data is gone.
Solid State Drives: The Wear Leveling Problem
SSDs store data in NAND flash cells organized into pages (typically 4-16 KB) and blocks (typically 256-512 pages). Unlike HDDs, SSDs cannot overwrite data in place. To modify a page, the SSD must erase the entire block containing that page, then write the new data to a fresh page — potentially in a completely different physical location.
This creates three problems for secure erasure:
- Wear leveling — The SSD controller distributes writes evenly across all NAND cells to prevent premature wear. When you "overwrite" a file, the SSD writes your new data to a different physical location than the original data. The original data may persist in its old location until the block gets garbage-collected.
- Over-provisioning — SSDs reserve 7 to 28 percent of their total NAND capacity for internal operations. This reserved space is invisible to the operating system and cannot be accessed by any software-based tool. Data remnants in over-provisioned space are inaccessible to users but theoretically recoverable by someone who desolders the NAND chips.
- TRIM and garbage collection — When the OS sends a TRIM command for deleted sectors, the SSD controller eventually erases those blocks — but "eventually" can mean milliseconds or hours depending on the controller's garbage collection schedule. During this window, the data persists.
The University of California San Diego published a landmark study in 2011 demonstrating that software-based file overwrite techniques recovered between 4 and 75 percent of data from SSDs, depending on the drive and technique used. Their conclusion: software-based secure erasure on SSDs is unreliable.
SSD Erasure: What Actually Works
For SSDs, you must use firmware-level commands that bypass the translation layer and address the physical NAND directly:
- ATA Secure Erase — A command defined in the ATA specification that instructs the drive controller to erase all user-accessible and hidden areas including over-provisioned space. The drive's firmware handles the actual erasure, which typically takes seconds to minutes regardless of drive capacity.
- ATA Enhanced Secure Erase — An extended version that also writes predetermined data patterns. Required by some compliance frameworks.
- Crypto Erase (Instant Secure Erase) — If the SSD supports hardware encryption (SED — Self-Encrypting Drive), Crypto Erase destroys the encryption key, rendering all data on the drive cryptographically unrecoverable. This completes in under a second regardless of drive size. Supported by most enterprise SSDs and many consumer NVMe drives manufactured after 2020.
File Shredding Tools by Platform
Here are the tools that actually work, organized by operating system.
Windows
BleachBit — Free, open-source. Securely deletes individual files, wipes free space, and cleans application traces (browser history, temp files, logs). Uses single-pass random overwrite. No installation required for the portable version. This is the tool to start with on Windows.
Eraser — Free, open-source. Integrates into the Windows Explorer context menu for right-click secure deletion. Supports scheduled erasure tasks. Allows configuring overwrite methods (Gutmann, DoD, pseudorandom — choose single-pass random). Can wipe free disk space, recycle bin, and specific folders on a schedule.
SDelete (Sysinternals) — Free, from Microsoft. Command-line tool developed by Mark Russinovich. Complies with DoD 5220.22-M. Handles alternate data streams and NTFS extended attributes that most tools miss. Usage: sdelete -p 1 -s -q targetfolder for a single-pass recursive deletion.
cipher /w — Built into Windows. The cipher /w:C: command overwrites all deallocated space on the C drive with three passes (zeros, ones, random). No installation needed. Slow on large drives, but useful for quick free space wiping without third-party software.
macOS
Apple removed the srm (secure remove) command in macOS 10.12 Sierra and removed the "Secure Empty Trash" option even earlier in 10.11 El Capitan. Apple's reasoning: on SSDs (which every Mac has used since at least 2015), software-based secure deletion is unreliable due to wear leveling.
Apple's recommended approach is FileVault full-disk encryption. When the entire disk is encrypted with FileVault 2 (AES-XTS-128), deleting a file and then destroying the FileVault key renders all data unrecoverable — effectively Crypto Erase. For individual file shredding on macOS, install BleachBit via Homebrew or use the diskutil secureErase command for full disk sanitization before disposal.
Linux
shred — Included in GNU coreutils (preinstalled on every Linux distribution). Usage: shred -vzn 1 filename performs one random pass, then a final zero pass, with verbose progress output. Effective on HDDs and file systems that do not use copy-on-write. Not effective on ext4 with journal, Btrfs, ZFS, or SSDs — use full disk tools instead.
wipe — Available in most package managers. Designed specifically for secure file and directory deletion. Overwrites file data, renames the file multiple times to obscure the filename, then unlinks it. More thorough than shred for filename sanitization.
nwipe — The open-source successor to DBAN for full disk sanitization. Supports multiple overwrite methods and verification. Runs from a live USB environment. The preferred tool for pre-disposal HDD sanitization on Linux.
Mobile Devices
iOS — Every iPhone since the 3GS (2009) uses hardware encryption. "Erase All Content and Settings" performs a Crypto Erase by destroying the encryption key stored in the Secure Enclave. The actual NAND data becomes cryptographic noise — mathematically unrecoverable. This is a genuinely secure implementation and completes in seconds. Individual file shredding is unnecessary and not supported because the encryption handles it at the block level.
Android — Android has supported full-disk encryption since 5.0 (2014) and file-based encryption since 7.0. Before performing a factory reset on Android, verify encryption is enabled in Settings. The factory reset then destroys the encryption keys. On older or unencrypted Android devices, use a free space overwrite app after factory reset, or boot into TWRP recovery and use the built-in formatting tools.
Full Disk Sanitization Before Disposal or Resale
Individual file shredding is useful during a drive's lifetime, but when you are selling, donating, or disposing of a drive, you need full disk sanitization. Half measures create false confidence.
HDD Full Disk Sanitization
DBAN (Darik's Boot and Nuke) / nwipe — DBAN was the gold standard for HDD sanitization for nearly two decades. It boots from USB, bypasses the operating system entirely, and writes directly to the drive at the hardware level. The open-source successor nwipe continues this capability with modern hardware support. For most purposes, select the "PRNG Stream" (single-pass random) method. A full single-pass wipe of a 2 TB HDD takes approximately 4 to 6 hours.
Manufacturer tools — Seagate SeaTools, WD Dashboard, and Toshiba Storage Diagnostic all include secure erase functions. These can issue ATA Secure Erase commands even on HDDs, which resets the drive to factory state.
SSD Full Disk Sanitization
Samsung Magician — Samsung's official management tool for Samsung SSDs. Includes Secure Erase and Crypto Erase functions that issue firmware-level commands. Creates a bootable USB drive because Secure Erase cannot run on the SSD housing the operating system.
Intel Memory and Storage Tool (MAS) — For Intel/Solidigm SSDs. Supports Secure Erase and Crypto Erase. Available for Windows and Linux.
Micron Storage Executive — For Crucial/Micron SSDs. Includes PSID Revert (physical security ID revert) for Opal-compliant SEDs, which performs a cryptographic erase and resets the drive to factory state.
hdparm (Linux) — The universal command-line tool for issuing ATA commands on Linux. Sequence: unfreeze the drive (may require a suspend/resume cycle), set a temporary password with hdparm --user-master u --security-set-pass temp /dev/sdX, then issue hdparm --user-master u --security-erase temp /dev/sdX. Requires care — incorrect usage can brick drives.
Hidden Data Remnants: What Shredding Tools Often Miss
Even good file shredding tools can miss data remnants stored outside the file's primary sectors. A thorough data sanitization strategy must account for these secondary locations.
Volume Shadow Copies (Windows)
Windows automatically creates Volume Shadow Copies (VSS) — point-in-time snapshots of files for recovery purposes. If VSS is enabled, previous versions of your "shredded" file may exist in shadow copy storage. Use vssadmin delete shadows /all /quiet to remove all shadow copies, or disable VSS entirely through System Protection settings.
Swap and Pagefile
When RAM fills up, the operating system writes memory contents to disk — the pagefile on Windows, swap partition on Linux. If you had sensitive data open in an application, fragments of that data may exist in the swap space. On Windows, you can configure Group Policy to clear the pagefile at shutdown (Security Settings → Local Policies → Security Options → "Shutdown: Clear virtual memory pagefile"). On Linux, encrypt the swap partition or use swapoff followed by overwriting the swap device.
File System Journals
NTFS, ext4, and other journaling file systems maintain transaction logs of recent file system operations. These journals can contain fragments of file metadata (names, sizes, timestamps) and sometimes small amounts of file content. Standard file shredding tools do not clear journal entries. Full disk sanitization is the only reliable way to erase journal contents.
Thumbnails and Application Caches
Windows stores thumbnail previews of images and documents in Thumbcache files. macOS stores them in the .DS_Store and QuickLook cache. Even after shredding the original image, a lower-resolution copy may persist in the thumbnail cache. BleachBit specifically targets these caches during its cleanup operation. Browser caches, email client caches, and office application recovery files create additional copies that must be individually addressed.
Legal Compliance Requirements for Data Destruction
Data destruction is not just good security practice — it is legally required in many jurisdictions and industries.
GDPR — Article 17: Right to Erasure
The General Data Protection Regulation gives EU residents the right to demand complete erasure of their personal data. "Erasure" under GDPR means the data must be rendered permanently unrecoverable. Simply deleting the file system pointer does not satisfy this requirement. Organizations must demonstrate that they used an appropriate sanitization method — NIST 800-88 or equivalent — and maintain records of the sanitization process.
HIPAA — Media Disposal
HIPAA requires covered entities to implement policies for the disposal of electronic protected health information (ePHI). The HIPAA Security Rule (164.310(d)(2)(i)) specifically requires that hardware and electronic media be properly disposed of before being made available for reuse. The HHS has fined organizations over 1 million dollars for improper ePHI disposal, including a 2013 case against Affinity Health Plan where photocopier hard drives containing patient data were returned to the leasing company without sanitization.
PCI DSS — Requirement 9.8
The Payment Card Industry Data Security Standard requires destruction of cardholder data when no longer needed. PCI DSS 4.0 requirement 9.4.6 specifies that hard-copy and electronic media must be destroyed when no longer needed for business or legal reasons. Acceptable destruction methods include cross-cut shredding for paper and secure erasure or physical destruction for electronic media.
Physical Destruction: When Software Is Not Enough
For the highest-sensitivity data — classified government information, source code for critical infrastructure systems, key material, data from extremely high-value litigation — physical destruction is the only acceptable option.
Degaussing — Exposing the drive to a powerful magnetic field that randomizes the magnetic domain alignment on the platters. Effective only for HDDs. Completely ineffective on SSDs because SSDs use electrical charges, not magnetic domains. A proper degausser costs 3,000 to 30,000 dollars and generates a field of at least 9,000 Oersteds (1.5 Tesla).
Physical shredding — Industrial shredders reduce hard drives to fragments typically 2 mm or smaller. Effective for both HDDs and SSDs. The NSA requires drives containing classified data to be shredded to particles no larger than 2 mm in any dimension. Certified destruction services provide certificates of destruction with serial numbers for audit trails.
Disintegration — A step beyond shredding. Disintegrators reduce media to particles of 1 mm or less using knife mills. This meets the NSA/CSS EPL (Evaluated Products List) requirements for the highest classification levels.
Incineration — Effective but environmentally problematic. Some destruction services use controlled incineration facilities with proper emissions handling. The melting point of aluminum (the material of most HDD platters) is 660 degrees Celsius. NAND flash chips begin losing data permanently above approximately 200 degrees Celsius.
A Practical Secure Deletion Workflow
Based on everything above, here is a practical workflow for different scenarios:
Scenario 1: Deleting Individual Sensitive Files (During Drive Lifetime)
On HDD: Use BleachBit or Eraser to overwrite the file with one random pass. After shredding, run BleachBit's free space wipe to catch any fragments in slack space. Clear thumbnail caches and application temp files.
On SSD: Individual file shredding is inherently unreliable on SSDs due to wear leveling. The best approach is to enable full-disk encryption (BitLocker, FileVault, LUKS) and then simply delete the file normally. The file data is encrypted at rest, so even if sectors persist, they are cryptographically unreadable without the encryption key.
Scenario 2: Disposing of a Drive (Selling, Donating, Recycling)
On HDD: Boot from a nwipe USB and perform a single-pass random overwrite of the entire drive. Verify completion. This satisfies NIST 800-88 Clear-level requirements and renders data unrecoverable by any software-based method.
On SSD: Use the manufacturer's secure erase utility (Samsung Magician, Intel MAS, etc.) or hdparm to issue ATA Secure Erase or Crypto Erase. Verify the drive reports as sanitized. If the drive is a Self-Encrypting Drive, PSID Revert is the fastest and most thorough option.
Scenario 3: Highest-Sensitivity Data (Legal, Classified, Medical Records)
Combine software sanitization with physical destruction. Perform Crypto Erase or Secure Erase first, then send the drive to a certified destruction service (NAID AAA Certified) for physical shredding. Retain the certificate of destruction for compliance audits. This two-layer approach protects against the approximately 8 percent of SSDs with buggy firmware implementations.
Common Mistakes That Leave Data Recoverable
These are the errors that people and organizations make repeatedly, even when they believe they are properly destroying data:
- Using multi-pass overwrites on SSDs — Waste of time. The SSD controller remaps writes, so you are not overwriting the original data location. Use firmware-level Secure Erase instead.
- Forgetting Volume Shadow Copies — You shredded the file but Windows has a complete copy in VSS. Always clear shadow copies when shredding sensitive files on Windows.
- Ignoring cloud sync — You shredded the local file, but Dropbox, OneDrive, or Google Drive has a copy in cloud storage and possibly in the cloud recycle bin for 30 to 90 days. Delete from cloud storage separately and empty the cloud trash.
- Not verifying the erase — Erase tools can fail silently, especially SSD firmware commands. Always verify by attempting recovery on a sample of data after the erase. Tools like photorec can be run against the erased drive to verify no recoverable data exists.
- Formatting instead of erasing — Quick Format on Windows and Fast Format on macOS only rewrite the file system metadata. This is functionally equivalent to deleting all files — the data itself remains. Full Format on Windows does perform a single-pass overwrite, but this is not well documented and should not be relied upon for compliance purposes.
- Trusting factory reset on old Android devices — Android devices running versions prior to 6.0 may not have encryption enabled by default. A factory reset without encryption leaves data recoverable via chip-off forensics.
Self-Encrypting Drives: The Modern Solution
Self-Encrypting Drives represent the most elegant solution to the secure deletion problem. An SED encrypts all data written to the NAND using an internal AES-256 key stored in a protected area of the drive controller. The encryption happens transparently at wire speed with zero performance impact.
When you need to securely erase an SED, you perform a Crypto Erase — which simply generates a new random encryption key, overwriting the old one. Every byte of data on the drive instantly becomes cryptographic noise. No need to overwrite terabytes of NAND. No need to wait hours. No concern about wear leveling or over-provisioning. The process completes in under one second for any drive size.
Major SED standards include TCG Opal 2.0 (the primary enterprise standard) and IEEE 1667. Most enterprise NVMe drives and many consumer NVMe drives manufactured after 2020 support at least basic SED functionality. Check your drive's specifications for "TCG Opal" or "eDrive" support.
The one caveat: SED security depends on correct firmware implementation. If the drive manufacturer botched the key generation, key storage, or erase procedure, Crypto Erase may not be effective. A 2018 study from Radboud University found critical vulnerabilities in the SED implementations of several Crucial (Micron) and Samsung drives. Both manufacturers released firmware updates, but the incident highlights that SED should be combined with software-layer encryption (BitLocker, LUKS) for defense in depth.
Recommendations Summary
Enable full-disk encryption on every device you own, right now, before you need to erase anything. BitLocker on Windows, FileVault on macOS, LUKS on Linux, and default device encryption on iOS and modern Android. This single action makes all future deletions inherently more secure because even unshredded data fragments are encrypted at rest.
For HDD shredding, BleachBit (file-level) and nwipe (full disk) are the right tools. One pass of random data is sufficient. Stop using 35-pass Gutmann — it wastes hours and provides zero additional security on modern drives.
For SSD shredding, use firmware-level commands: ATA Secure Erase or Crypto Erase via manufacturer tools or hdparm. Software overwrite tools do not work reliably on SSDs. If your SSD supports TCG Opal, PSID Revert is the fastest option.
For the highest sensitivity, combine Crypto Erase with physical destruction through a NAID AAA Certified destruction service. Retain the certificate of destruction for your compliance records. No single layer provides absolute guarantee, but two layers make data recovery genuinely impossible.
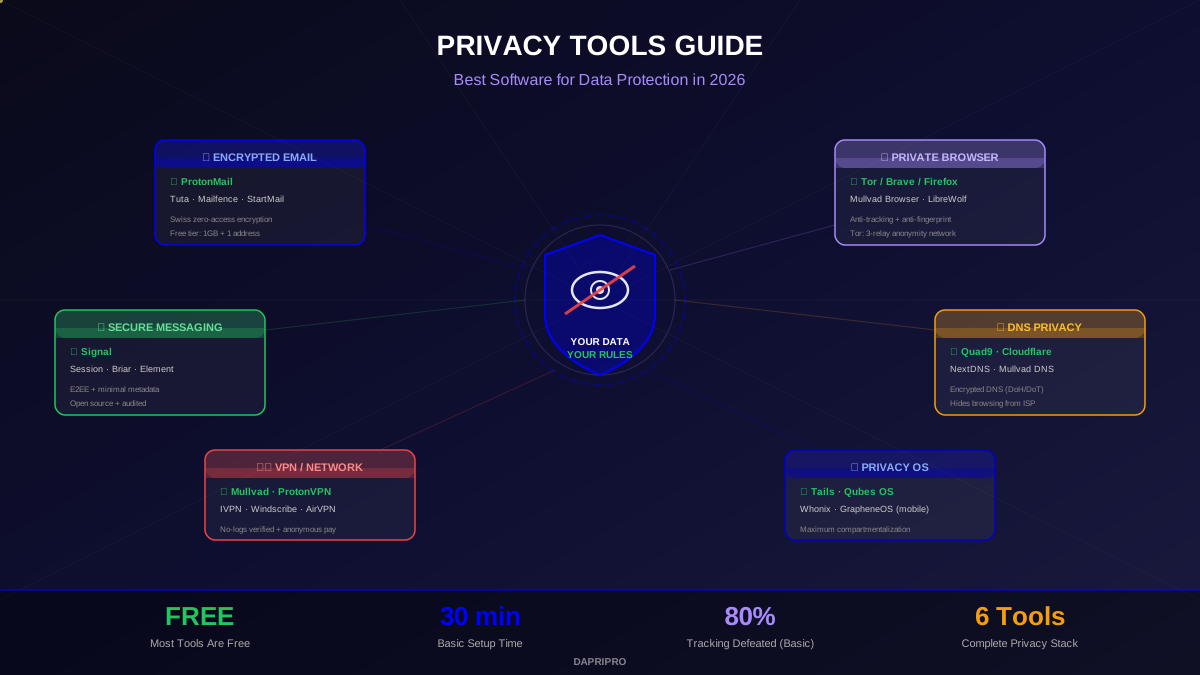
For more privacy and security tools, explore our Privacy Tools section. For encryption fundamentals, see our Data Encryption guides.