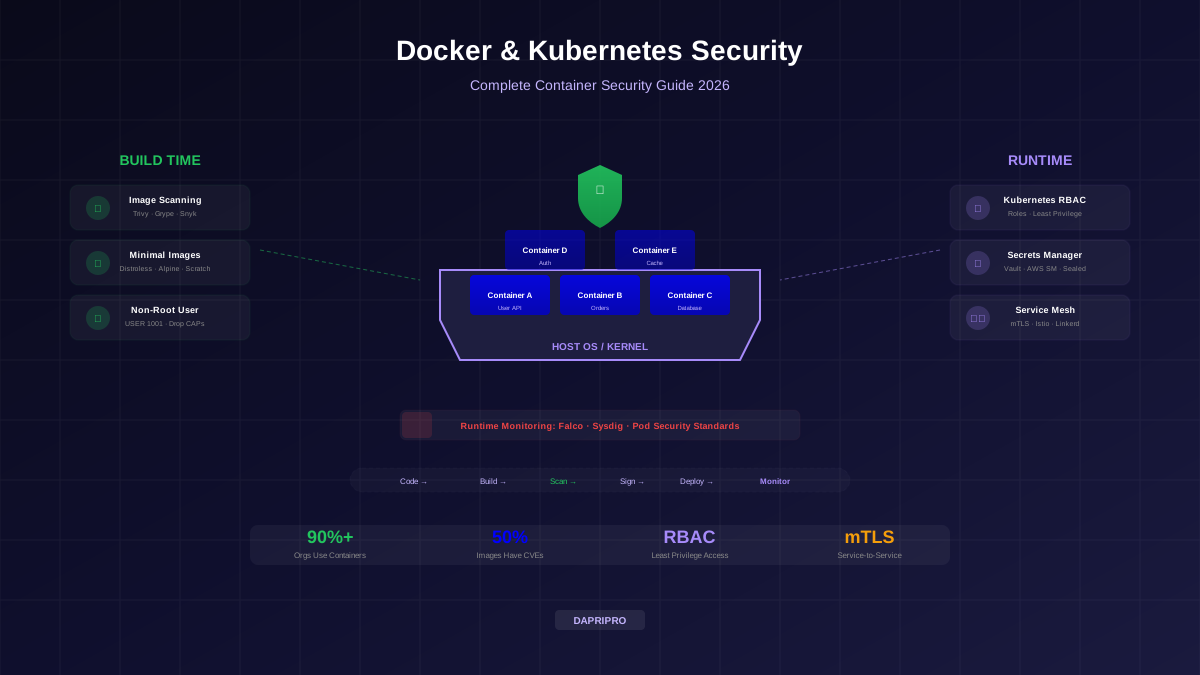

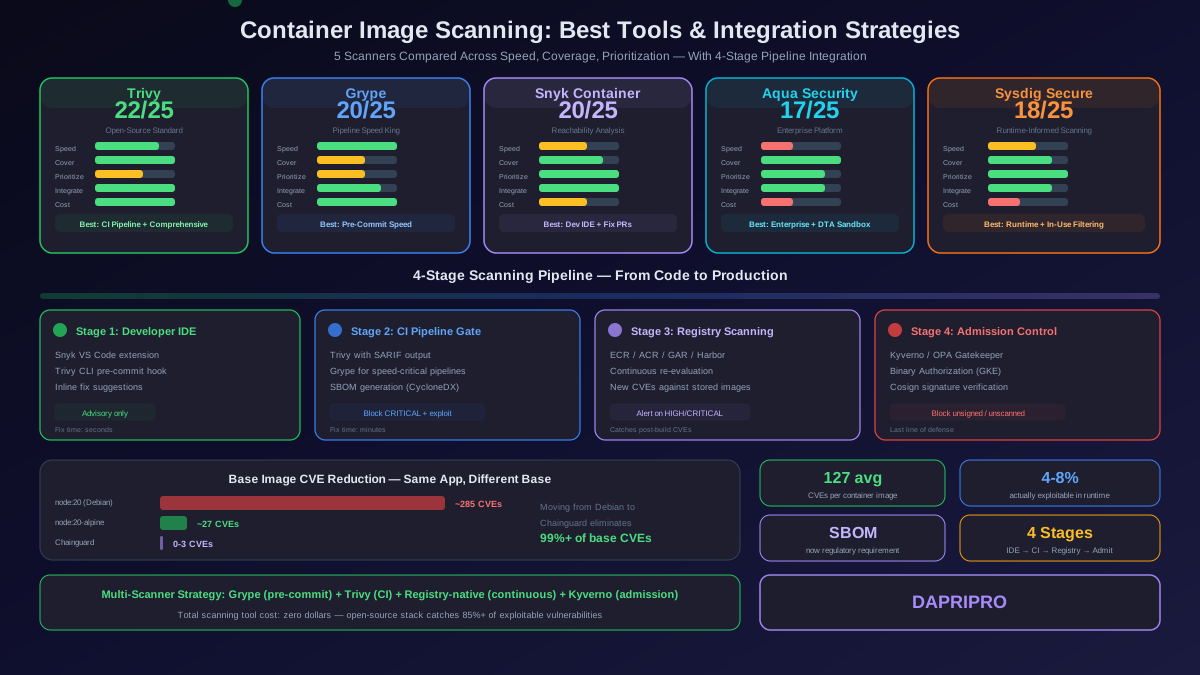
Every container image you deploy to production is a frozen snapshot of an operating system, language runtime, application dependencies, and your code — all bundled into a single artifact. When you pull that base image from Docker Hub, you inherit every vulnerability in its OS packages. When your Dockerfile installs dependencies, you inherit every CVE in those libraries. And when a new vulnerability is disclosed next week against a package already baked into your running containers, you inherit that too.
Container image scanning is the practice of analyzing these layers to find known vulnerabilities, misconfigurations, embedded secrets, and license compliance issues before they reach production. But the scanning landscape in 2026 looks very different from even two years ago. Tools have gotten faster, vulnerability databases have gotten broader, and the shift from simple CVE counting to exploitability-aware prioritization has fundamentally changed what "good" scanning looks like.
This guide compares the leading container image scanners, shows you how to integrate them into real CI/CD pipelines, and addresses the hardest problem in container scanning: what to do when your scanner reports 200 vulnerabilities and your developers have time to fix 10.
What Container Image Scanners Actually Analyze
A container image is a stack of filesystem layers, each created by a Dockerfile instruction. Scanners decompose this stack and analyze multiple dimensions:
| Analysis Layer | What It Checks | Example Findings | Data Source |
|---|---|---|---|
| OS packages | Installed packages from apt, yum, apk | CVE-2024-3094 in xz-utils 5.6.0 | NVD, OS vendor advisories (Ubuntu USN, Alpine secdb, RHEL OVAL) |
| Language dependencies | npm, pip, gem, Maven, Go modules, Cargo | CVE-2025-XXXX in lodash 4.17.x | GitHub Advisory Database, OSV, language-specific advisories |
| Application binaries | Compiled binaries, static libraries linked | Vulnerable OpenSSL version statically linked into Go binary | Binary analysis, hash matching against vulnerability databases |
| Image configuration | Dockerfile best practices, user permissions | Container runs as root, no HEALTHCHECK defined | CIS Docker Benchmark, custom policies |
| Embedded secrets | API keys, passwords, tokens in image layers | AWS access key in environment variable or config file | Pattern matching, entropy analysis |
| License compliance | Open-source license compatibility | GPL-3.0 dependency in proprietary application | SPDX, CycloneDX SBOM data |
| Malware | Known malicious packages, cryptominers | Backdoored npm package, embedded cryptominer binary | Signature databases, behavioral indicators |
The critical distinction is that not all scanners cover all layers. Trivy covers OS packages, language dependencies, IaC misconfigurations, and secrets. Grype focuses on OS packages and language dependencies with best-in-class speed. Snyk Container adds reachability analysis to determine which vulnerabilities are actually called in your code. Understanding these coverage differences is essential for choosing the right tool — or the right combination of tools.
Scanner Deep Comparison: Trivy, Grype, Snyk, Aqua, and Sysdig
There are dozens of container scanning tools, but five dominate production deployments in 2026. Here is how they compare across the dimensions that actually matter:
Trivy — The Open-Source Standard
Trivy (by Aqua Security) has become the default open-source container scanner because it does the most things well. It scans container images, filesystem directories, Git repositories, Kubernetes clusters, and IaC files — all from a single binary with zero dependencies.
What makes Trivy stand out in 2026:
- Broadest language coverage — supports OS packages (Alpine, Debian, Ubuntu, RHEL, Amazon Linux, SUSE, Photon, CBL-Mariner) plus 15 language ecosystems (npm, pip, Composer, Maven, Gradle, Go, Rust, Ruby, NuGet, Swift, Dart, Elixir, Conan, Conda, Julia).
- SBOM generation and consumption — generates SPDX and CycloneDX SBOMs natively. Can also scan existing SBOMs rather than re-analyzing the image.
- VEX support — accepts VEX documents (OpenVEX format) to suppress vulnerabilities confirmed as not exploitable, cutting false positive noise dramatically.
- Kubernetes integration — the Trivy Operator runs as a Kubernetes controller, continuously scanning every image in your cluster and storing results as CRDs (VulnerabilityReport, ConfigAuditReport, ExposedSecretReport).
- Speed — first scan takes 15 to 30 seconds for a typical image. Subsequent scans with cached vulnerability database complete in 3 to 8 seconds.
Limitations: No reachability analysis (it cannot tell you if a vulnerable function is actually called in your code). No centralized dashboard without third-party tools. Community support only (no SLA).
Grype — Built for Pipeline Speed
Grype (by Anchore) is purpose-built for CI/CD pipeline integration where scan time directly impacts developer velocity. It uses the same Syft SBOM engine as Anchore Enterprise but strips away everything that slows down a pipeline scan.
Key advantages:
- Fastest scan times — consistently 30 to 50 percent faster than Trivy on equivalent images, completing most scans in 2 to 5 seconds with a warm database cache.
- SBOM-first architecture — Syft generates the SBOM, Grype evaluates it against vulnerability databases. This separation means you can generate the SBOM once and re-evaluate it whenever vulnerability data updates.
- Minimal resource footprint — uses significantly less memory than Trivy during scans, important for resource-constrained CI runners.
- Clean JSON output — output format designed for pipeline automation and programmatic consumption.
Limitations: Narrower OS distribution support than Trivy. No IaC scanning, no secret detection, no Kubernetes operator. Purely a vulnerability scanner — does one thing extremely well.
Snyk Container — Reachability Analysis Changes Everything
Snyk Container's differentiator is reachability analysis. Instead of just telling you "this image contains a vulnerable library," it tells you "this vulnerable library's affected function is called by your code at line 47 of server.js." This context transforms how developers prioritize fixes.
Key advantages:
- Reachability analysis — for supported languages (JavaScript, Java, Python, Go), Snyk traces call graphs to determine if the vulnerable code path is reachable from your application code.
- Automated fix PRs — when a vulnerability has a fix available, Snyk can automatically open a pull request that bumps the dependency or switches to a patched base image.
- Base image recommendations — suggests alternative base images with fewer vulnerabilities. If you are using node:18, it might recommend node:18-slim or node:18-alpine with a specific count of eliminated CVEs.
- Developer IDE integration — VS Code, IntelliJ, and JetBrains plugins show vulnerability data inline as developers write Dockerfiles.
Limitations: Reachability analysis only works for a few languages. Free tier limited to 200 container tests per month. Pricing scales per developer, which gets expensive for large teams. Vulnerability database updates are sometimes 12 to 24 hours behind NVD for non-critical CVEs.
Aqua Security — Enterprise Container Security Platform
Aqua is a full container security platform rather than just a scanner. Image scanning is one module alongside runtime protection, compliance enforcement, and Kubernetes security. For large enterprises running thousands of containers across multiple clusters, Aqua provides the centralized governance layer that open-source tools lack.
Key advantages:
- Dynamic Threat Analysis (DTA) — Aqua actually runs the container in a sandbox and monitors its behavior (network calls, file access, process execution) before allowing it into production. This catches supply chain attacks that static scanning misses.
- vShield runtime patching — can apply virtual patches to vulnerable packages in running containers without rebuilding the image, buying time when immediate redeployment is not possible.
- Drift prevention — detects and blocks runtime modifications to container filesystems, preventing attackers from installing tools post-compromise.
- Compliance templates — pre-built policies for PCI-DSS, HIPAA, SOC 2, NIST 800-53 mapped to container-specific controls.
Limitations: Complex to deploy and configure. Pricing requires annual contract negotiation. Scanning speed is slower than purpose-built scanners because DTA adds significant overhead. Overkill for teams with fewer than 500 containers.
Sysdig Secure — Runtime Intelligence Feeds Scanning
Sysdig Secure's unique approach feeds runtime intelligence back into scanning prioritization. If a vulnerable package exists in an image but the container never loads that library at runtime, Sysdig deprioritizes it. This runtime-informed scanning reduces actionable findings by 60 to 85 percent compared to traditional scanners.
Key advantages:
- Runtime-informed prioritization — uses Falco-based runtime monitoring to determine which packages are actually loaded in memory, dramatically reducing false positives.
- In-use vulnerability filtering — a "critical" CVE in a package that is never loaded at runtime gets deprioritized, letting developers focus on vulnerabilities that actually matter.
- Risk spotlight — combines vulnerability severity, exploit availability (EPSS), runtime exposure, and network reachability into a single risk score.
- Kubernetes-native — deep integration with Kubernetes admission controllers, blocking vulnerable images at deployment time rather than just alerting.
Limitations: Requires the Sysdig agent deployed to every node for runtime intelligence (not agentless). Runtime-informed prioritization only works after the container has been running long enough to profile. Higher resource consumption than pure scanning tools.
CI/CD Pipeline Integration Patterns
The point of container scanning is to catch vulnerabilities before they reach production. The best scanning tool in the world is useless if it runs after deployment. Here is how to integrate scanners at every stage of your container lifecycle.
Stage 1: Developer IDE — Catch Issues at the Keyboard
The cheapest vulnerability to fix is the one caught before the code is committed. IDE integration surfaces vulnerability data as developers write Dockerfiles and dependency manifests.
Snyk offers the most polished IDE experience — its VS Code extension highlights vulnerable base images and dependencies inline with fix suggestions. For Trivy, the community-maintained VS Code extension provides basic scanning triggered on file save. Grype does not have native IDE integration, but the terminal-based workflow is fast enough for pre-commit checks.
Stage 2: CI Pipeline Gate — Block Vulnerable Images at Merge
The CI pipeline is where scanning enforcement happens. When a developer opens a pull request that modifies a Dockerfile or dependency file, the CI pipeline should automatically build the image, scan it, and fail the build if critical vulnerabilities are found.
The key design decisions for CI scanning:
| Decision | Recommended Approach | Rationale |
|---|---|---|
| When to scan | On every PR that touches Dockerfile, lockfile, or dependency manifest | Catches new vulnerabilities at introduction, not after merge |
| What severity to block on | Block on CRITICAL with known exploit. Warn on HIGH. Ignore MEDIUM/LOW in CI | Blocking on too many severities causes alert fatigue and developers bypass the gate |
| How to handle base image CVEs | Allowlist OS-level CVEs that do not affect your application. Block application-level CVEs | Base image CVEs are often not exploitable in your context. Blocking all of them makes CI gates useless |
| Scan timeout | Set 120-second timeout. Fail open with alert if scanner times out | Scanner downtime should not block deployments. The registry scan catches what CI misses |
| Result format | SARIF output uploaded to GitHub Security tab or GitLab Security Dashboard | Developers see vulnerability details in the PR interface without switching tools |
Stage 3: Registry Scanning — Continuous Monitoring of Stored Images
CI scanning only evaluates an image at build time. But new CVEs get published continuously — a vulnerability disclosed three days after your image was built and pushed to the registry will not be caught by CI scanning. Registry scanning solves this by periodically re-evaluating stored images against updated vulnerability databases.
Major container registries now include built-in scanning:
- Amazon ECR — Enhanced scanning powered by Amazon Inspector. Supports continuous scanning (re-evaluates when new CVEs are published). Covers OS and language packages.
- Google Artifact Registry — Automated scanning with Container Analysis API. Supports on-push and continuous scanning. Integrates with Binary Authorization for deployment gating.
- Azure Container Registry — Microsoft Defender for Containers provides vulnerability assessment. Covers OS and language packages with runtime filtering.
- Docker Hub — Docker Scout powered by Snyk vulnerability data. Included in Docker Pro/Team subscriptions. Limited to 10 repositories on free tier.
- Harbor — Open-source registry with built-in Trivy scanning. Can block pulls of images exceeding a severity threshold. Excellent for air-gapped environments.
Stage 4: Admission Control — Last Line Before Production
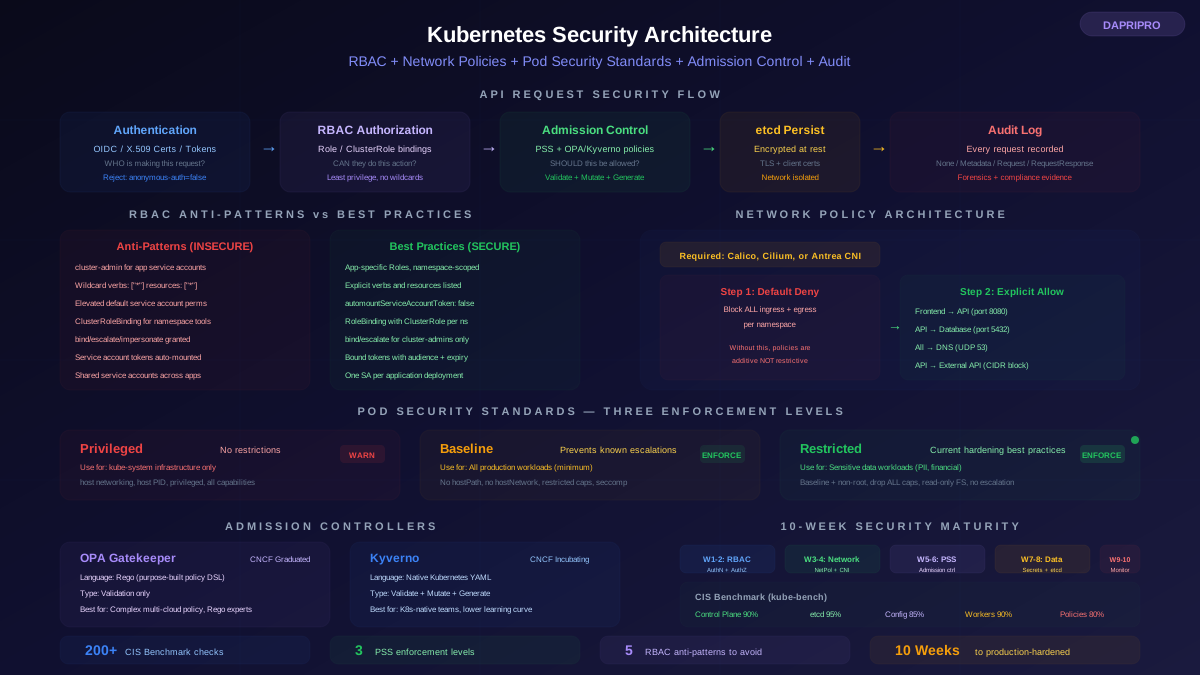
Even with CI scanning and registry scanning, images can slip through if developers push directly to a registry, if a tag is overwritten with a different image, or if a Kubernetes manifest references an image that was never scanned. Admission controllers provide the final gate.
A Kubernetes admission controller intercepts every pod creation request and verifies that the container image meets your security requirements before the kubelet pulls it. Implementations include:
- Kyverno — Kubernetes-native policy engine. Uses YAML-based policies that verify image signatures, check scan results stored as image attestations, and enforce base image requirements. Easiest to adopt for teams already comfortable with Kubernetes YAML.
- OPA Gatekeeper — Rego-based admission controller. More powerful policy language than Kyverno but steeper learning curve. Can query external APIs for real-time vulnerability data during admission.
- Binary Authorization (GKE) — Google Cloud's native admission control. Requires images to have attestations signed by authorized parties before they can be deployed to GKE clusters.
- Sigstore Cosign + Policy Controller — Verifies that images are signed and optionally that vulnerability scan attestations meet threshold requirements. Open-source, cloud-agnostic.
SBOM Generation: From Nice-to-Have to Regulatory Requirement
Software Bill of Materials (SBOM) generation has become mandatory in 2026 for any organization selling to US federal agencies (per Executive Order 14028), for FedRAMP-authorized systems, and increasingly for SOC 2 Type II audits that now include software supply chain controls.
An SBOM is a complete inventory of every component in your container image — every OS package, every language dependency, every binary — with version numbers, licenses, and supplier information. The two dominant formats are:
| Format | Standard Body | Strengths | Best For |
|---|---|---|---|
| SPDX (2.3 / 3.0) | Linux Foundation | License compliance focus, ISO standard (ISO/IEC 5962:2021), rich relationship modeling | License compliance, government reporting, legal requirements |
| CycloneDX (1.6) | OWASP | Security focus, VEX integration, vulnerability correlation, services and ML model support | Security scanning, vulnerability management, DevSecOps pipelines |
For security-focused workflows, CycloneDX is the better choice because it natively supports VEX (Vulnerability Exploitability eXchange) documents, which let you annotate each vulnerability with its exploitability status. For compliance-focused workflows, SPDX is preferred because it is an ISO standard that satisfies regulatory requirements more clearly.
All five major scanners generate SBOMs: Trivy produces both formats, Syft (the Grype companion) generates both, Snyk generates CycloneDX, and Aqua and Sysdig support both formats through their platforms.
Taming the Noise: False Positive Management
The biggest operational challenge with container scanning is not finding vulnerabilities — it is dealing with the sheer volume of findings. A typical Node.js application image based on Debian contains 150 to 250 reported CVEs. A Java application on Ubuntu can exceed 300. When developers see hundreds of findings on every scan, they stop looking at any of them.
The Vulnerability Prioritization Framework
Effective prioritization requires evaluating each vulnerability across four dimensions:
| Dimension | Question | Data Source | Impact on Priority |
|---|---|---|---|
| Severity | How bad is the vulnerability in theory? | CVSS score (NVD), vendor advisory severity | Baseline priority — but alone, it is not enough |
| Exploitability | Does a public exploit exist? Is it being used in the wild? | EPSS score, CISA KEV catalog, ExploitDB | EPSS above 0.5 = treat as critical regardless of CVSS |
| Reachability | Is the vulnerable code path exercised by our application? | Snyk reachability analysis, Sysdig runtime profiling, VEX documents | Not reachable = deprioritize to low, even if CVSS is critical |
| Exposure | Is the vulnerable component accessible from the network? From the internet? | Kubernetes network policies, pod security context, service mesh config | Internet-facing + exploitable = maximum priority |
When you apply all four dimensions, the typical image with 200 reported CVEs often has only 5 to 15 that are genuinely high-priority (exploitable, reachable, and exposed). This reduction from 200 to 15 is what makes container scanning actionable rather than overwhelming.
Building an Allowlist That Scales
You will want to maintain an allowlist of CVEs that your team has evaluated and determined to be not exploitable or not relevant. The wrong way to do this is a spreadsheet that someone updates manually. The right way is a machine-readable allowlist that integrates with your scanner.
Trivy supports a .trivyignore file where you list CVE IDs with expiration dates and justifications. Grype uses a YAML configuration file with similar functionality. For a more standardized approach, OpenVEX documents provide a formal specification for declaring the exploitability status of each CVE in the context of your specific product.
Every allowlisted CVE should have three attributes: who approved the suppression, why it was approved (with technical justification), and when the suppression expires (forcing re-evaluation). Without expiration dates, allowlists become stale graveyards of assumed-safe vulnerabilities.
Base Image Strategy: Your Biggest Lever for Reducing CVEs
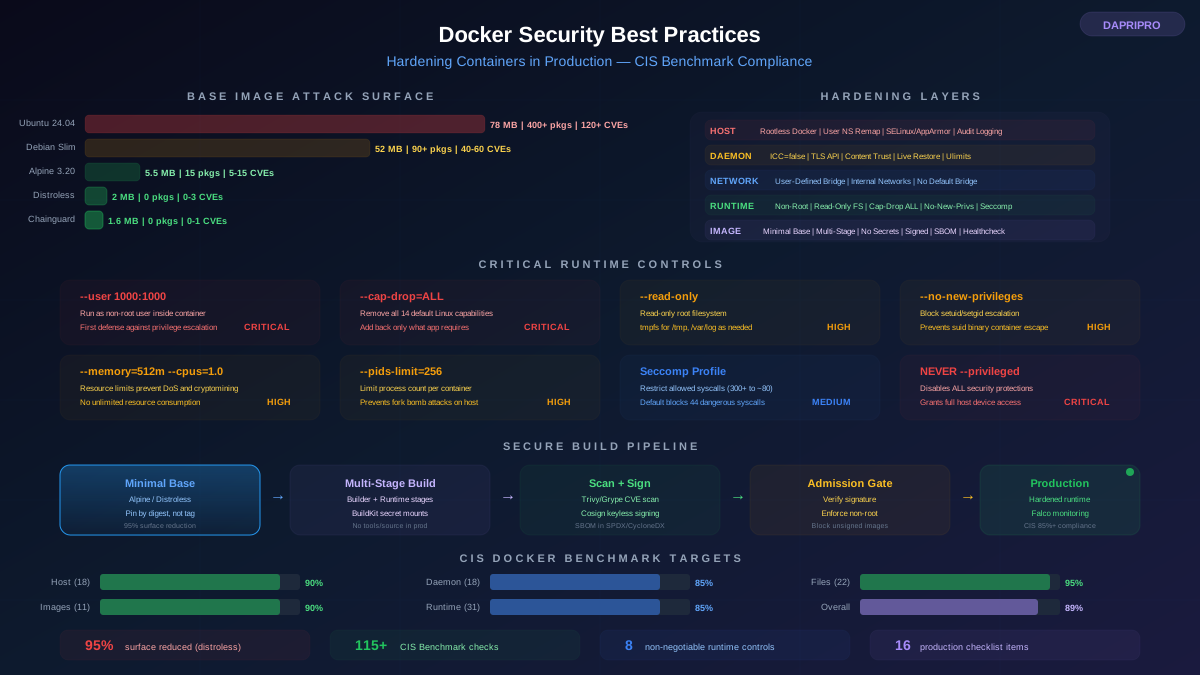
The single most impactful thing you can do to reduce your vulnerability count is choose the right base image. The difference between a full Debian-based image and a distroless or Alpine-based image can be hundreds of CVEs.
The base image hierarchy from most to fewest vulnerabilities:
- Full OS images (Debian, Ubuntu) — 200 to 400 CVEs. Include shells, package managers, and system utilities. Useful for debugging but terrible for security.
- Slim variants (node:20-slim, python:3.12-slim) — 80 to 150 CVEs. Remove documentation, man pages, and some system utilities. Better, but still carry significant OS surface area.
- Alpine-based images — 10 to 40 CVEs. musl libc instead of glibc. Much smaller attack surface. Watch out for musl compatibility issues with some npm native modules and Python extensions.
- Distroless images (Google) — 5 to 15 CVEs. Contain only the language runtime and your application — no shell, no package manager, no system utilities. Excellent security but harder to debug.
- Chainguard Images — 0 to 5 CVEs. Rebuilt daily from source with the latest patches. Designed specifically for minimal vulnerability surface. Commercial licensing for most images, but free developer tier available.
For production workloads in 2026, the recommendation is Alpine-based images as the default (best balance of security and day-to-day compatibility) with distroless or Chainguard for high-security workloads where the debugging trade-off is acceptable. Keep a full Debian-based debug image available but never deploy it to production.
The Multi-Scanner Strategy That Actually Works
No single scanner excels at everything. The most effective production deployments use a layered approach:
| Stage | Recommended Scanner | Why This Choice | Gate Policy |
|---|---|---|---|
| Developer IDE | Snyk (if budget allows) or Trivy CLI | Best inline fix suggestions (Snyk) or zero-cost (Trivy) | Advisory only — no blocking |
| Pre-commit hook | Grype | Fastest — completes in 2-3 seconds, does not slow down commits | Warn on CRITICAL, do not block |
| CI pipeline | Trivy | Broadest coverage, SARIF output for GitHub/GitLab, SBOM generation | Block on CRITICAL with EPSS above 0.5 |
| Registry | Platform-native (ECR/ACR/GAR) or Harbor+Trivy | Continuous re-evaluation as new CVEs are published | Alert on new HIGH/CRITICAL in stored images |
| Admission control | Kyverno or OPA Gatekeeper | Verify image signature + scan attestation before pod creation | Block unsigned images, block images with unresolved CRITICAL CVEs |
This layered approach ensures that vulnerabilities are caught at the earliest practical stage while avoiding the alert fatigue that comes from running every scanner at every stage. The pre-commit hook catches the obvious issues before they leave the developer machine. CI catches everything else with comprehensive scanning. Registry catches new CVEs published against already-built images. And admission control provides the final safety net.
The total cost of this stack — using Grype, Trivy, and a native registry scanner — is zero dollars for the scanning tools themselves. The only cost is the engineering time to set up the pipeline integrations, which typically takes two to three days for a team with CI/CD experience. If you add Snyk for IDE integration and reachability analysis, expect 40 to 100 dollars per developer per month depending on plan and team size.
Container image scanning is a solved problem in 2026 — the tools are mature, the integration patterns are well-documented, and the community has converged on best practices. The challenge is not finding the right scanner. It is building the operational processes around scanning that make vulnerability data actionable rather than overwhelming. Start with Trivy in CI, add a registry scanner, enforce a reasonable blocking policy, and iterate your way to a comprehensive scanning program as your team builds confidence.