
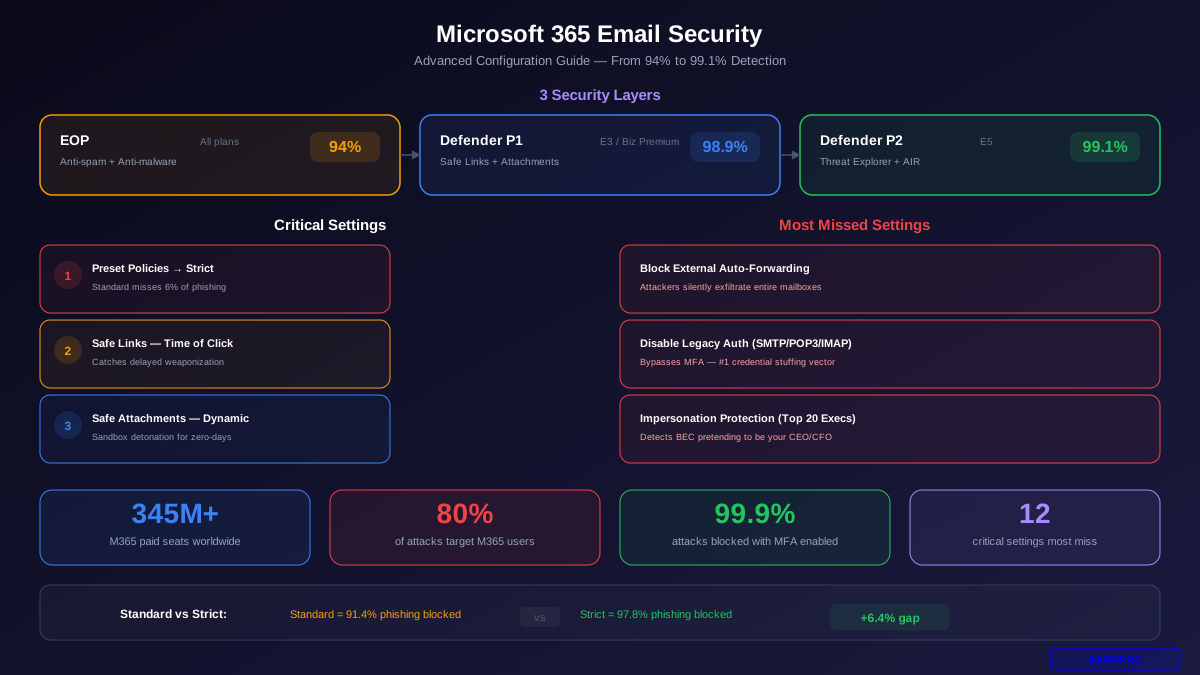
Microsoft 365 is the world's most used business email platform with over 345 million paid seats. It is also the most targeted — 80% of email attacks specifically target Microsoft 365 users. The good news is that M365 has powerful built-in security. The bad news is that most companies run it with default settings, leaving major gaps.
This guide walks you through every security layer in Microsoft 365 email, from basic Exchange Online Protection to advanced Defender for Office 365 configurations. Follow these steps exactly and you will block 99%+ of email-based threats without buying a third-party tool.
Understanding the 3 Security Layers
Microsoft 365 email security has three layers, each requiring a different license:
| Layer | Included In | What It Does | Detection Rate |
|---|---|---|---|
| Exchange Online Protection | All plans | Anti-spam, anti-malware, mail flow rules | 94% |
| Defender Plan 1 | E3, Business Premium | Safe Links, Safe Attachments, anti-phishing | 98.9% |
| Defender Plan 2 | E5 | Threat Explorer, AIR, Attack Simulation | 99.1% |
Most companies with E3 or Business Premium licenses have Defender Plan 1 available but never configure it. They are paying for advanced protection but running with only the basic layer active.
Step 1: Enable Preset Security Policies (Strict Mode)
Microsoft provides two preset security policy profiles: Standard and Strict. Your tenant defaults to Standard, which leaves gaps. Strict mode catches 97.8% of phishing versus 91.4% for Standard — a 6% gap that translates to hundreds of extra phishing emails reaching inboxes every month in a 500-person company.
How to enable Strict mode:
- Go to security.microsoft.com > Policies & Rules > Threat Policies
- Click Preset Security Policies
- Under "Strict protection," toggle to Enabled
- Assign to All recipients (or specific groups for a phased rollout)
- Click Save
Strict mode automatically configures optimal settings for anti-spam, anti-phishing, Safe Links, and Safe Attachments. The key difference: Strict mode quarantines suspicious emails instead of sending them to junk, and it uses a more aggressive phishing detection threshold.
Step 2: Configure Safe Links (Time-of-Click Protection)
Safe Links rewrites URLs in emails to route through Microsoft's scanning service. When the user clicks, Microsoft checks the URL in real-time and blocks it if it is malicious. This catches delayed weaponization attacks where the link is clean at delivery but becomes malicious hours later.
Critical Safe Links settings:
- Scan URLs at time of click: Enabled (not just at delivery)
- Apply to messages within the organization: Enabled (internal phishing from compromised accounts)
- Do not rewrite URLs but check via Safe Links API: Enabled (uses native URLs for better user experience)
- Wait for URL scanning to complete before delivering the message: Enabled
- Apply Safe Links to Office applications: Enabled (protects links in Word, Excel, Teams)
Do not add exceptions to your Safe Links policy for "trusted" domains unless absolutely required. Attackers frequently use compromised legitimate sites to host phishing pages — a URL on sharepoint.com or google.com can still be malicious.
Step 3: Configure Safe Attachments (Sandbox Detonation)
Safe Attachments opens every email attachment in a virtual sandbox, executes it, and watches for malicious behavior before delivering to the user. This catches zero-day malware that signature-based scanning misses.
Recommended settings:
- Action: Dynamic Delivery (deliver the email body immediately, replace attachment with placeholder until scanning completes — usually 1-2 minutes)
- Redirect: Send detected malicious attachments to your security team mailbox for investigation
- Apply to SharePoint, OneDrive, and Teams: Enabled (scans files uploaded to cloud storage)
Dynamic Delivery is the best balance between security and productivity. "Block" mode holds entire emails until scanning completes, which delays legitimate emails and frustrates users. Dynamic Delivery lets them read the message immediately while the attachment is being scanned.
Step 4: Configure Anti-Phishing Policies
The anti-phishing policy in Defender for Office 365 includes impersonation detection — it catches emails where attackers pretend to be specific people or domains.
Configure these settings:
User impersonation protection:
- Add your CEO, CFO, and top 20 executives/managers by name and email
- Action: Quarantine the message
- Show impersonation safety tip: Enabled
Domain impersonation protection:
- Protect your owned domains: Enabled
- Add custom domains: Include domains of key suppliers, partners, and your law firm
- Action: Quarantine the message
Mailbox intelligence:
- Enable mailbox intelligence: Yes (learns communication patterns to detect impersonation)
- Enable intelligence-based impersonation protection: Yes
- Action: Move to junk folder (less aggressive — reduces false positives while maintaining protection)
12 Critical Settings Most Admins Miss
| # | Setting | Where to Configure | Why It Matters |
|---|---|---|---|
| 1 | Disable external auto-forwarding | EAC > Mail flow > Rules | Attackers set up forwarding to exfiltrate data silently |
| 2 | Enable mailbox audit logging | PowerShell or Compliance | Track who accessed what and when |
| 3 | Disable SMTP AUTH | EAC > Active Users > Mail | Legacy auth bypasses MFA |
| 4 | Block legacy auth protocols | Entra ID > Conditional Access | POP3/IMAP4 are credential theft vectors |
| 5 | Enable MFA for all users | Entra ID > Security Defaults | Blocks 99.9% of account compromise |
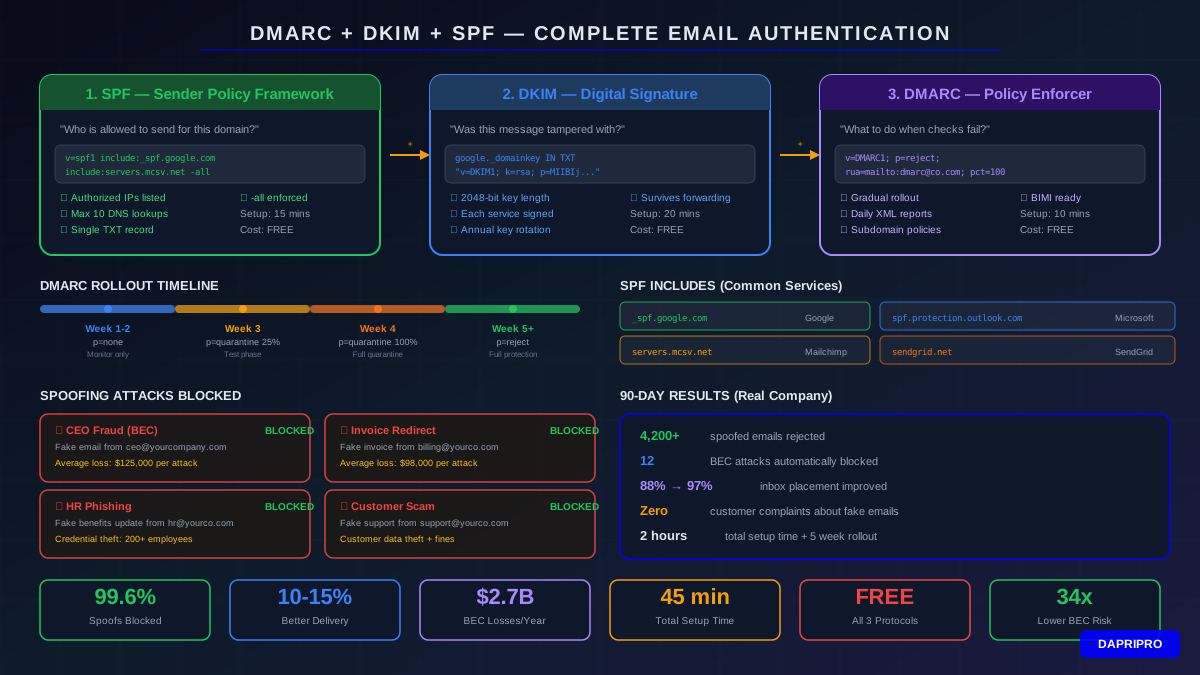
| 6 | Configure DMARC with reject | DNS records | Prevents domain spoofing |
| 7 | External sender tag | EAC > Mail flow > Rules | Visual warning for external emails |
| 8 | Enable ZAP (zero-hour auto purge) | Defender > Anti-spam policies | Retroactively removes delivered threats |
| 9 | Restrict who can create connectors | EAC > Mail flow > Connectors | Prevents bypass of security scanning |
| 10 | Alert policies for suspicious activity | Compliance > Alert policies | Detect unusual mail patterns |
| 11 | Report Message add-in | M365 admin > Integrated apps | Employees can report phishing with one click |
| 12 | Tenant Allow/Block List | Defender > Policies > T/A/B List | Override false positives without weakening policy |
Essential Mail Flow Rules to Create
Rule 1: Block External Auto-Forwarding
Go to Exchange Admin Center > Mail flow > Rules. Create a new rule: "If the message is sent to External, and the message type is Auto-forward," set the action to "Reject the message with the explanation: External auto-forwarding is not permitted." This single rule prevents attackers from silently forwarding a compromised mailbox to their external email.
Rule 2: External Sender Warning Banner
Create a rule that prepends a disclaimer to all emails from outside your organization: "CAUTION: This email originated from outside your organization. Do not click links or open attachments unless you recognize the sender and know the content is safe." Apply to all messages except those from your trusted partner domains.
Rule 3: Executive Impersonation Alert
Create a rule that flags emails where the display name matches one of your executives but the sender domain is not your company domain. This catches the most basic BEC attacks where attackers use your CEO's name with a Gmail or look-alike address.
Using Attack Simulation Training (E5)
Microsoft 365 E5 includes Attack Simulation Training — a phishing simulation tool built directly into the Defender portal. You do not need KnowBe4 or Cofense if you have E5.
How to set up a simulation:
- Go to security.microsoft.com > Attack simulation training > Simulations
- Click Launch a simulation
- Choose technique: Credential Harvest, Malware Attachment, Link in Attachment, or Drive-by URL
- Select a payload template from Microsoft's library (100+ templates based on real attacks)
- Target specific users or the entire organization
- Set the launch date and duration
- Assign a training module for users who click
Run simulations monthly and review the results in the Simulation report. Track click rate, report rate, and compromised rate for each department. Microsoft provides recommended training assignments based on each user's risk profile.
Ongoing Monitoring and Threat Hunting
Security is not a one-time configuration. Review these dashboards weekly:
- Threat Explorer (E5): Shows every threat detected and missed. Filter by phishing, malware, and BEC. Use this to understand what types of attacks target your organization.
- Mail flow status report: Shows email volume trends, top malware families detected, and spoofing detections.
- Compromised user alerts: Defender automatically detects and alerts on suspicious sign-in patterns, unusual mail sending, and inbox rule changes that suggest account compromise.
- Quarantine review: Check quarantine weekly for false positives. If legitimate emails are being quarantined, add sender exceptions through the Tenant Allow/Block List — not by weakening your overall policy.
Microsoft 365 has more email security capability than most companies realize. The problem is not missing features — it is unconfigured features. Follow this guide from top to bottom, and you will have enterprise-grade email security using tools you already own and pay for.