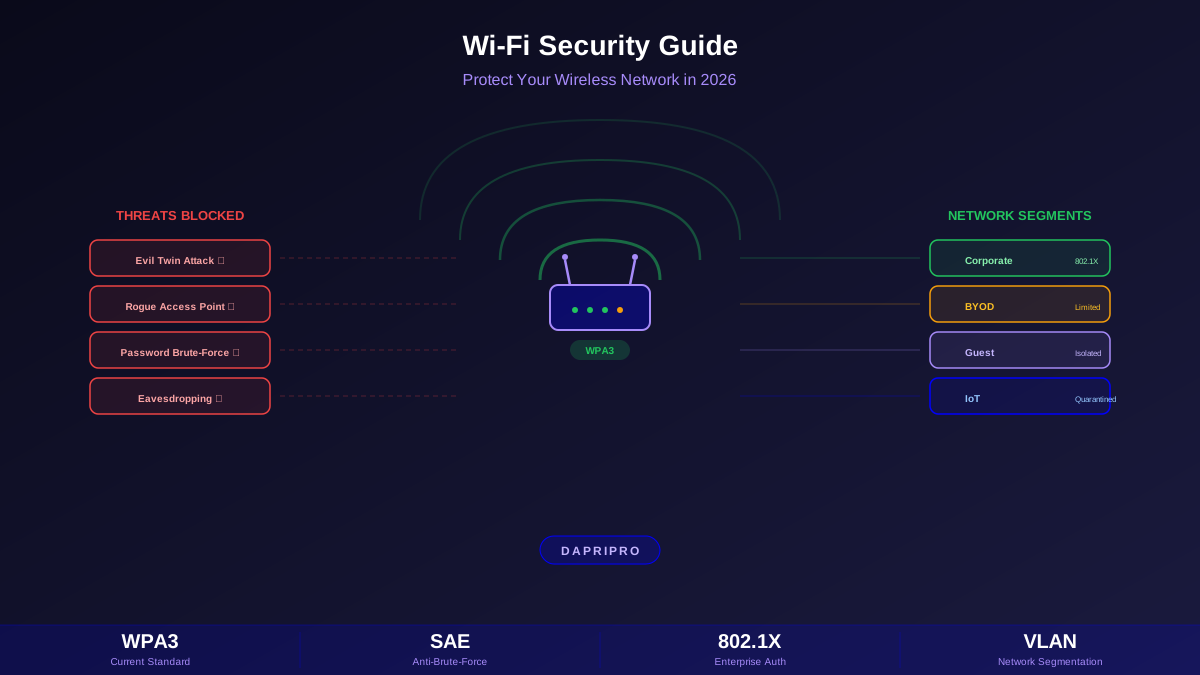

Your guest Wi-Fi network is a front door to your organization that you hand the key to strangers. Every visitor, contractor, delivery person, and client who connects gets a foothold on your network. The question is whether that foothold lets them reach your file servers, printers, security cameras, and employee workstations — or whether it gives them internet access and nothing else.
Most small and mid-sized businesses get this wrong. They create a guest network on the same subnet as their corporate devices, use a password that has not changed in months, and call it done. That guest network is a flat bridge to everything on the internal network. This guide shows you how to build a guest Wi-Fi setup that is genuinely isolated, properly controlled, and safe to hand out to anyone who walks through your door.
Why a Separate Guest Network Is Not Optional
When a guest device connects to your network, you have no control over its security posture. You do not know if it has current patches, running antivirus, or active malware. You cannot enforce your security policies on devices you do not own. The only thing you can control is what that device can access once connected.
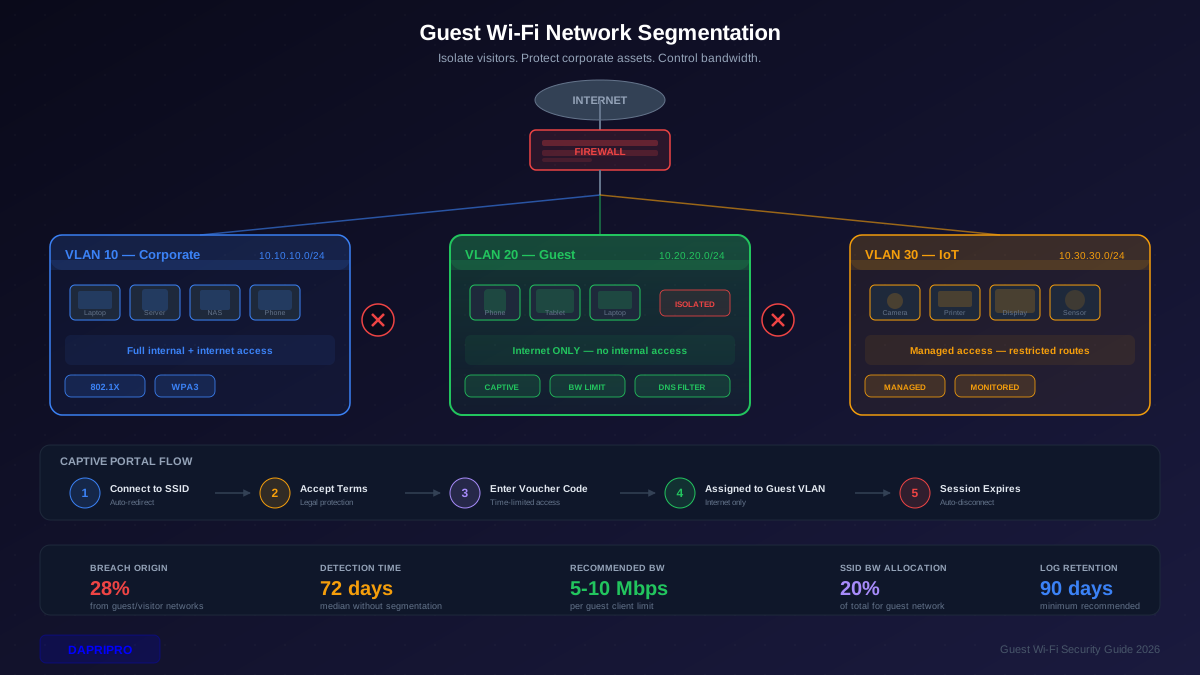
Without segmentation, a compromised guest device can scan your entire network, discover shared resources, attempt to exploit vulnerabilities in your servers and workstations, and exfiltrate data. In 2025, 28% of network intrusions started from a device on a guest or visitor network that had access to internal resources. The median time to detect these intrusions was 72 days — because security teams were monitoring the perimeter, not internal lateral movement from a "trusted" guest network.
Proper guest network segmentation creates a clear boundary: guests get internet access through your connection, but a firewall stands between them and everything else. Even if a guest device is actively infected with malware, it cannot reach your internal systems.
VLAN Architecture: Building the Separation Layer
VLANs (Virtual Local Area Networks) are the foundation of guest network segmentation. A VLAN creates a logically separate network that shares the same physical infrastructure but behaves as if it were a completely different network. Guest traffic stays on the guest VLAN. Corporate traffic stays on the corporate VLAN. A firewall or router controls what traffic (if any) can cross between them.
Planning Your VLAN Layout
At minimum, you need three VLANs for a properly segmented wireless deployment:
- VLAN 10 — Corporate: Employee devices, domain-joined machines, internal servers. This is your trusted network with full access to internal resources.
- VLAN 20 — Guest: Visitor devices with internet-only access. No routes to VLAN 10 or VLAN 30. Firewall rules explicitly deny all traffic to RFC 1918 private address ranges.
- VLAN 30 — IoT/Devices: Printers, smart TVs, security cameras, conference room displays. These devices often have weak security and should be isolated from both corporate and guest networks.
Assign each VLAN its own subnet. For example: VLAN 10 uses 10.10.10.0/24, VLAN 20 uses 10.20.20.0/24, VLAN 30 uses 10.30.30.0/24. Run DHCP for each VLAN — either from your router/firewall or from dedicated DHCP servers — with appropriate lease times. Guest devices should get short DHCP leases (1-4 hours) so IP addresses are reclaimed quickly.
Switch and AP Configuration
Configure your switches with trunk ports that carry all VLANs to your access points and firewall. Access points need to support multiple SSIDs mapped to different VLANs — most enterprise and prosumer APs support this. Create a corporate SSID mapped to VLAN 10 and a guest SSID mapped to VLAN 20.
On your firewall or layer-3 switch, create inter-VLAN routing rules. The critical rule: deny all traffic from VLAN 20 (guest) to VLAN 10 (corporate) and VLAN 30 (IoT). Allow VLAN 20 to reach the internet (via your WAN interface). Allow VLAN 20 to reach your DNS server (or use an external DNS like Cloudflare 1.1.1.1 for the guest network). Block everything else.
Test the isolation by connecting a device to the guest network and attempting to ping or scan hosts on the corporate VLAN. If any packets get through, your firewall rules need adjustment. This test should be part of your regular security audits.
Client Isolation: Preventing Guest-to-Guest Attacks
VLAN segmentation prevents guests from reaching your corporate network. But what about guests attacking each other? Without client isolation, every device on the guest SSID can communicate with every other device on the same SSID. An attacker on your guest network can ARP spoof other guests, intercept their traffic, and steal their credentials.
Client isolation (called AP isolation, peer-to-peer blocking, or station isolation depending on the vendor) prevents direct communication between wireless clients on the same SSID. Each guest device can only communicate with the gateway — not with other guest devices. Enable this on the guest SSID in your AP or wireless controller settings. It is typically a single checkbox but makes a significant security difference.
Some scenarios require exceptions. If your guest network supports wireless printing or screen mirroring (Chromecast, AirPlay), client isolation will block those protocols since they rely on device-to-device communication. The solution is to put shared devices like printers and displays on the IoT VLAN (VLAN 30) with controlled access, rather than relaxing client isolation on the guest SSID.
Captive Portal Configuration
A captive portal is the web page that appears when someone connects to your guest network. Before they can access the internet, they must accept your terms of service, enter an access code, or provide contact information. The captive portal serves three purposes: legal liability protection, access control, and usage logging.
Captive Portal Options
Terms-of-service acceptance: The simplest option. The guest sees a page with your acceptable use policy and clicks "Accept" to get internet access. This creates a legal record that the user agreed to your terms, which protects you if someone uses your network for illegal activity. No password required — simplest for visitors but least control over who connects.
Pre-shared access code: The portal requires a code that you give to visitors at reception. You can rotate this code daily or weekly. This adds a layer of access control — only people who physically visited your office get the code. The downside is the same code works for everyone during its validity period.
Individual voucher codes: Each visitor gets a unique code generated by the captive portal system. The code has an expiration time (4, 8, or 24 hours typically). Receptionists print or text the code to visitors. This gives you individual accountability — you know exactly who connected and when — plus automatic expiration. This is the best option for most businesses.
Social login / email registration: Guests log in with Google, LinkedIn, or provide their email. The portal collects contact information, which is useful for customer-facing businesses (retail, hospitality). Privacy considerations apply — disclose what data you collect and how you use it. This approach is more common in retail and hospitality than in corporate offices.
Captive Portal Implementation
Most enterprise wireless controllers (Cisco, Aruba, Meraki, Ubiquiti) include built-in captive portal functionality. For standalone APs, open-source solutions like pfSense with the Captive Portal package or OpenNDS provide the same capability for free. Commercial options like Cisco Meraki, Aruba ClearPass, and Purple Wi-Fi add analytics and marketing features.
Configure the captive portal to redirect HTTP and HTTPS traffic to the portal page. Set a session timeout (4-24 hours) after which the user must re-authenticate. Log connection events including timestamp, MAC address, IP address, and the authentication method used. Store logs for at least 90 days for incident investigation purposes.
Bandwidth Controls and Rate Limiting
Without bandwidth limits, a single guest streaming 4K video or downloading large files can consume your entire internet connection, impacting employee productivity. Bandwidth controls ensure fair usage and protect your business traffic.
Per-Client Rate Limiting
Set a maximum download and upload speed per guest client. Reasonable limits for most office environments are 5-10 Mbps download and 2-5 Mbps upload. This is more than enough for web browsing, email, and video conferencing. It prevents any single device from monopolizing bandwidth.
Configure rate limiting on your wireless controller or firewall. On Ubiquiti UniFi, this is set in the User Group settings. On Cisco Meraki, use the Bandwidth Limits in the SSID configuration. On pfSense, use the Limiter feature under Firewall rules for the guest VLAN interface.
Per-SSID Bandwidth Caps
In addition to per-client limits, set a total bandwidth cap for the entire guest SSID. If your internet connection is 500 Mbps, you might allocate 100 Mbps total to the guest network. Even if 50 guests connect simultaneously, the total guest traffic cannot exceed 100 Mbps, protecting the remaining 400 Mbps for corporate use.
Some organizations implement time-based policies: during business hours, guest bandwidth is capped at 20% of total capacity. After hours, the cap increases to 50% since fewer employees are using the corporate network.
Content Filtering
Apply DNS-based content filtering to the guest network. Services like Cloudflare Gateway, Cisco Umbrella, or OpenDNS Family Shield block malware domains, phishing sites, and optionally adult or gambling content. Configure the guest VLAN's DHCP server to distribute your filtered DNS server addresses. Block DNS traffic (port 53) to external servers so guests cannot bypass your filtering by using alternate DNS.
Security Hardening for Guest Networks
Beyond basic segmentation, several additional measures strengthen your guest network security.
Disable network discovery protocols: Block mDNS (Bonjour), LLMNR, and NetBIOS on the guest VLAN. These protocols allow devices to discover services and other devices on the network — useful on corporate networks, unnecessary and potentially dangerous on guest networks.
Prevent DNS rebinding attacks: Configure your DNS server to reject responses containing private IP addresses for queries from the guest network. DNS rebinding is a technique where an attacker's website instructs the visitor's browser to make requests to internal IP addresses, bypassing the firewall's VLAN restrictions. Most modern firewalls and DNS resolvers have DNS rebinding protection built in — enable it.
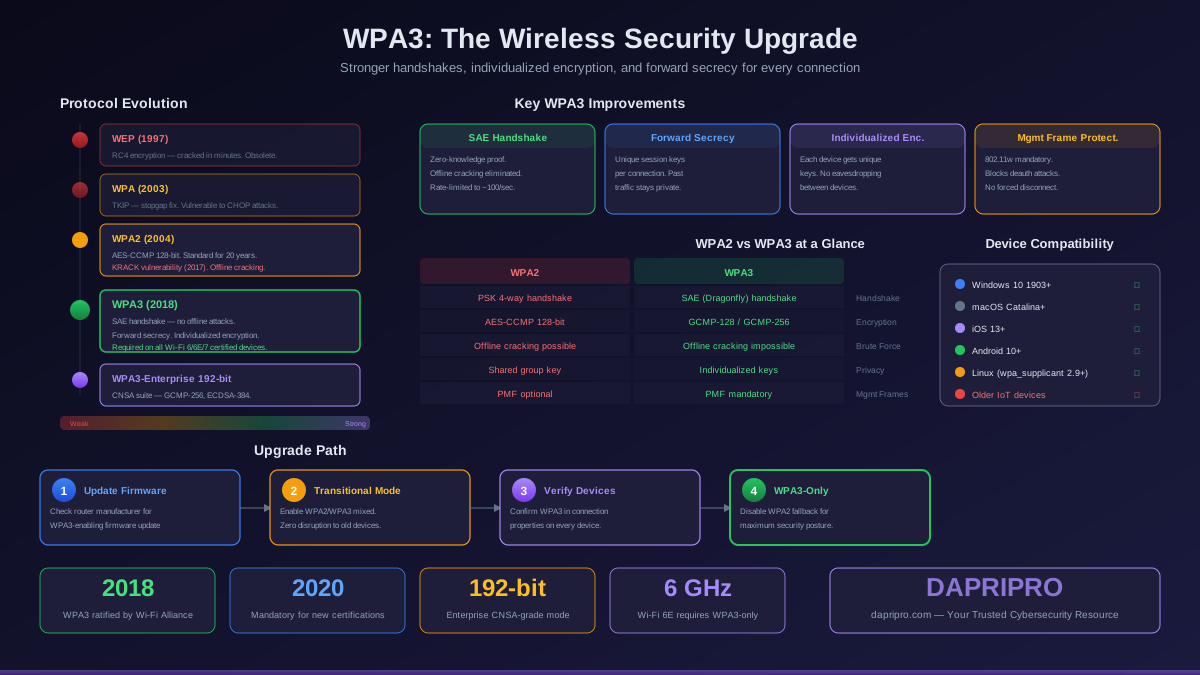
Use WPA3-Personal (SAE) for guest networks: WPA3's Simultaneous Authentication of Equals replaces the old WPA2 handshake and provides resistance against offline dictionary attacks. Even if someone captures the handshake, they cannot brute-force the password offline. If WPA3-Personal is not supported by some guest devices, use WPA2/WPA3 transition mode.
Disable management access from guest VLAN: Ensure that your router admin interface, switch management interface, AP management interface, and any other infrastructure management pages are not accessible from the guest VLAN. Block traffic from VLAN 20 to all management IP addresses and management ports (SSH, HTTPS admin, SNMP).
Monitor guest network traffic: Even though the guest network is isolated, monitor it for signs of malicious activity. High volumes of scanning traffic, connections to known command-and-control servers, or unusual traffic patterns may indicate a compromised guest device. Forward guest network logs to your SIEM for correlation with other security events.
Special Scenarios: Conference Rooms, Retail, and Multi-Tenant
Conference Room Wi-Fi
Conference rooms present a unique challenge. External visitors need internet access during meetings, but they may also need to share their screen to the room's display or print to a nearby printer. The solution is to place conference displays and printers on the IoT VLAN with specific firewall rules allowing traffic from the guest VLAN only to those specific devices, only on the required ports (AirPlay, Miracast, IPP/printing). This provides functionality without opening broad network access.
Retail and Hospitality
Customer-facing Wi-Fi in retail and hospitality has different priorities. Speed of connection matters — customers will not fill out lengthy forms. A simple captive portal with terms acceptance and optional email collection works best. Set bandwidth limits lower (2-3 Mbps per client) since there may be hundreds of simultaneous users. Consider partnering with a commercial hotspot provider (Purple Wi-Fi, Cloud4Wi) that handles compliance, analytics, and marketing integration.
Multi-Tenant Buildings
Shared office buildings need guest networks that serve multiple tenants without cross-contamination. Each tenant should have their own guest VLAN with separate SSID and captive portal branding. The building management company provides the shared infrastructure (APs, switches, internet uplink) while VLANs ensure complete isolation between tenants. This typically requires a managed wireless solution with multi-tenant support — Cisco Meraki, Aruba Central, or Mist AI are common choices.
Implementation Checklist
Use this checklist when setting up or auditing your guest Wi-Fi network. Every item should be verified, not assumed.
- VLAN created and assigned — Guest SSID maps to a dedicated VLAN with its own subnet and DHCP scope
- Firewall rules configured — All traffic from guest VLAN to corporate and IoT VLANs is blocked. Only internet access is permitted
- Client isolation enabled — Guest devices cannot communicate directly with each other
- Captive portal deployed — Terms of service presented and accepted before internet access is granted
- Bandwidth limits applied — Per-client and per-SSID caps prevent bandwidth abuse
- DNS filtering active — Malware and phishing domains blocked. External DNS servers unreachable from guest VLAN
- Management interfaces blocked — Router, switch, AP, and firewall admin pages inaccessible from guest network
- Discovery protocols disabled — mDNS, LLMNR, and NetBIOS blocked on guest VLAN
- Logging enabled — Connection events logged with MAC address, timestamp, and session duration
- Password rotation scheduled — Credentials change on a defined schedule (daily, weekly, or per-voucher)
- Isolation tested — Verified by scanning from guest network to confirm no internal hosts are reachable
Revisit this checklist quarterly. Network changes, firmware updates, and new devices can inadvertently weaken your guest network isolation. What was secure last quarter may have a new gap today.